
Let’s be honest—small kitchens can feel cramped. You’re probably wondering how to make the most of your limited space without sacrificing style. Open shelving might be your answer, but it requires careful planning to avoid visual chaos. You’ll want to thoughtfully consider what goes where, how often you access items, and which materials work best for your aesthetic. The key lies in striking a balance between functionality and visual appeal while keeping everything within reach.
Why Open Shelving Works for Small Kitchens
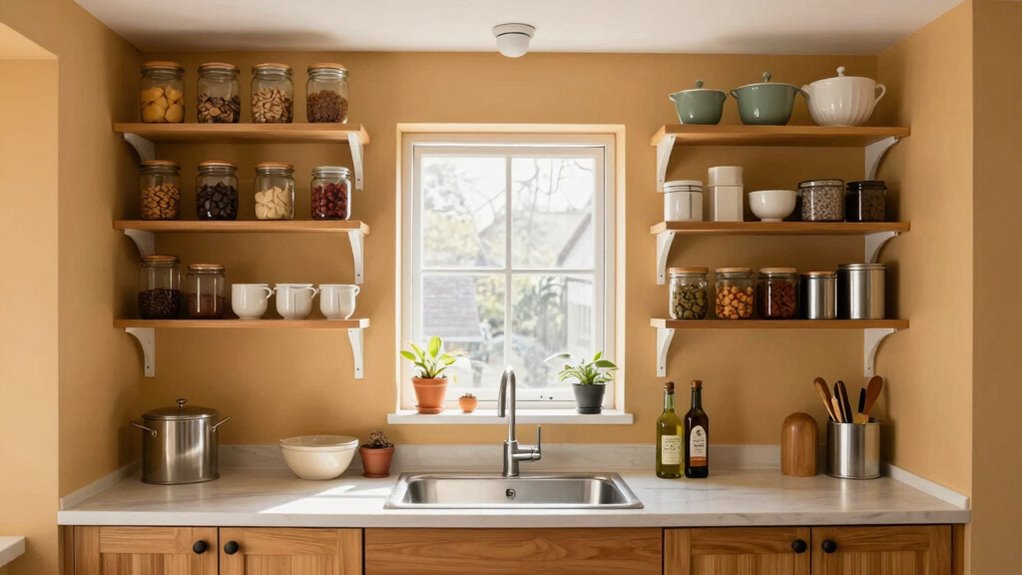
Why not maximize your small kitchen’s potential with open shelving? You create an immediate sense of space by eliminating cabinet doors that close off your room. Open shelves make your kitchen feel larger and more welcoming to guests.
You gain quick access to frequently used items without fumbling with handles or doors. Storage becomes part of your kitchen’s visual appeal when you display attractive dishes and cookware. You can easily see everything you own, preventing duplicate purchases and helping you cook more efficiently.
Cleaning becomes simpler since dust doesn’t accumulate behind closed doors. Open shelving connects you to your cooking tools, creating a sense of ownership and control over your kitchen space that closed cabinets can’t provide.
How to Plan Your Open Shelf Layout
Planning your open shelf layout requires careful consideration of what you use most often and where you’ll need quick access. Start by measuring your wall space and marking stud locations.
Consider your kitchen workflow: place frequently used items at eye level and within arm’s reach. Install shelves in zones – cooking zone, prep zone, and cleanup zone.
Leave adequate spacing between shelves; 12-15 inches works for most items. Think about traffic flow; don’t block walkways or appliance doors. Position taller items toward the back and shorter items in front.
Plan for vertical storage by stacking similar items. Create a cohesive look by maintaining consistent shelf depths. Leave some flexibility for seasonal items or changing needs.
Your layout should feel intuitive and support your daily cooking routine.
What Items to Display (and What to Hide)

You should display attractive items like colorful dishes and glassware that enhance your kitchen’s visual appeal.
Keep functional tools and everyday essentials within easy reach using smart storage solutions like hooks and baskets.
Hide clutter and messy items behind cabinet doors or in designated storage areas to maintain a clean, organized appearance.
Attractive Display Items
A well-organized small kitchen relies on strategic display choices that maximize both functionality and visual appeal.
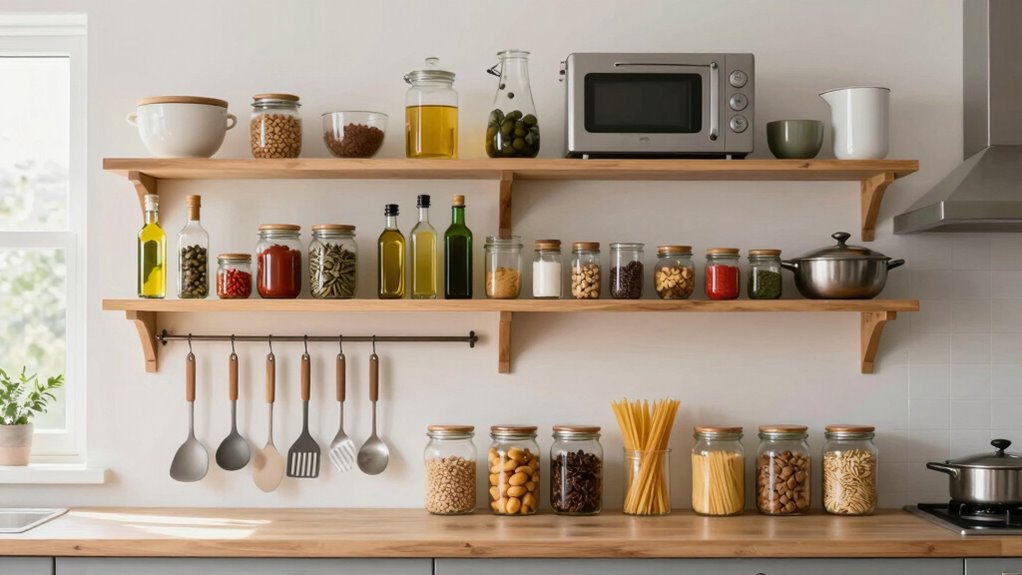
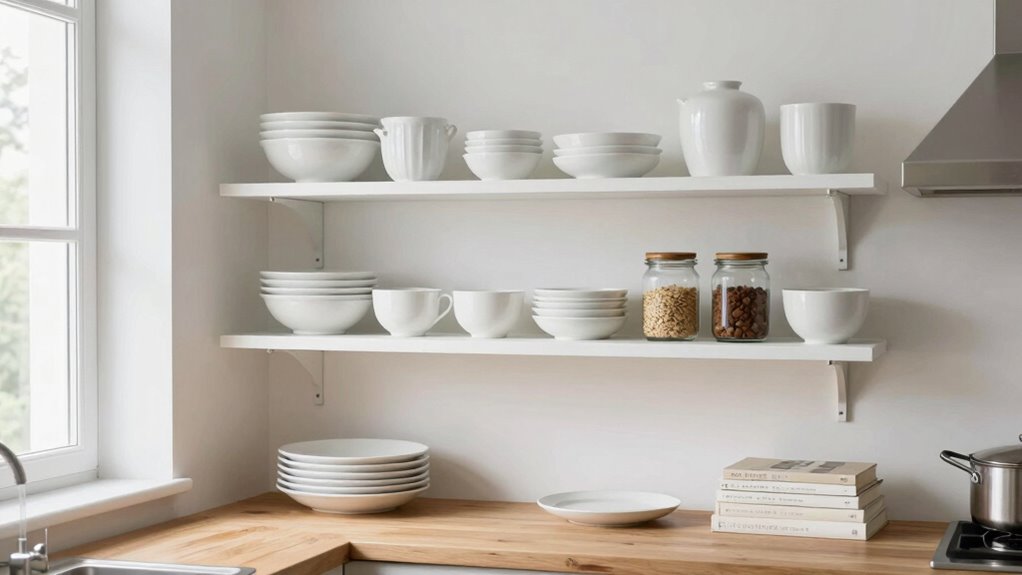
You should showcase items that serve dual purposes: attractive canisters storing flour, sugar, and grains create instant visual impact while staying practical.
Display your most-used spices in coordinated containers rather than hiding them in cabinets. Stackable bowls and plates in complementary colors draw eyes upward, making your space feel larger.
Choose three to five decorative pieces maximum—overcrowding creates visual chaos. Hide clutter-inducing items like mismatched Tupperware lids, expired ingredients, and random kitchen gadgets.
Store everyday appliances you don’t use daily behind cabinet doors. Keep countertops clear except for one or two frequently-used items.
Your goal is creating a curated look that feels intentional, not cluttered.
Functional Storage Solutions
Smart storage solutions transform cramped kitchens into efficient workspaces through deliberate choices about what earns countertop real estate.
You maximize functionality by displaying items you use daily while concealing clutter that disrupts visual flow. Prioritize accessibility without sacrificing aesthetics.
- Daily essentials like spices, oils, and frequently used tools deserve prominent shelf placement.
- Occasional items such as holiday dishes or special occasion cookware belong in less accessible areas.
- Bulk storage containers should remain hidden in cabinets or pantries.
- Personal decorative pieces can blend functionality with visual appeal when chosen thoughtfully.
You create belonging through organized spaces that reflect your lifestyle. Every item should serve purpose or bring joy.
Hidden Mess Management
Managing what stays visible and what gets concealed makes small kitchens feel larger and more intentional. You should display everyday essentials like favorite dishes, attractive cookbooks, and beautiful glassware. Keep appliances you use daily visible, but store away anything you use monthly or seasonally.
Hide messy items like spice containers, food storage boxes, and mismatched lids behind cabinet doors. Use baskets or bins to contain clutter while maintaining accessibility. Stack items strategically with frequently used pieces at eye level. Group similar items together visually.
You create harmony when everything has designated storage spots. This approach eliminates visual chaos while keeping necessities within reach. Your kitchen reflects intentional living through thoughtful organization choices.
Choose the Right Shelving Material and Style
While you’re planning your small kitchen’s storage solution, choosing the right shelving material and style can maximize both functionality and space efficiency.
Your shelving should reflect your lifestyle while serving your daily needs.
Consider these essential factors:
- Wood shelving brings warmth and blends with most kitchen décors, but requires regular cleaning to prevent grease buildup.
- Metal shelves offer durability and easy maintenance, ideal for heavy items like pots and pans.
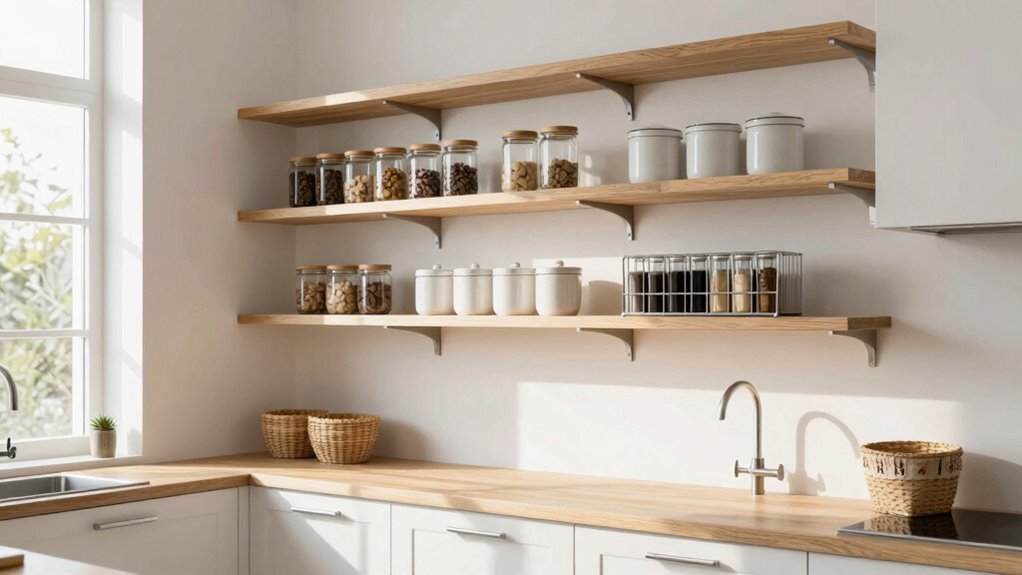
- Glass shelving creates visual lightness, making your kitchen feel larger while showcasing your dishes attractively.
- Adjustable shelving systems let you customize spacing based on your changing storage needs.
Select materials that match your cooking habits and aesthetic preferences.
Your shelves should feel like they belong in your space while working hard for you.
How to Keep Open Shelves Clutter-Free
Although open shelves can quickly become overwhelming with too many items, keeping them clutter-free requires a systematic approach to what you display and how you arrange it.
Start by editing your collection – keep only items you use regularly or that bring you joy.
Group similar items together and designate specific zones for different categories like spices, dishes, or cookbooks.
Rotate seasonal items to maintain fresh displays.
Clean shelves weekly by wiping surfaces and reassessing what stays.
Create visual breathing room by leaving some empty space rather than filling every inch.
You’ll feel more organized and proud of your kitchen’s curated look.
Best Practices for Shelf Height and Spacing
Proper shelf height and spacing make everything in your small kitchen easier to reach and use.
You’ll maximize efficiency when you position shelves strategically throughout your space.
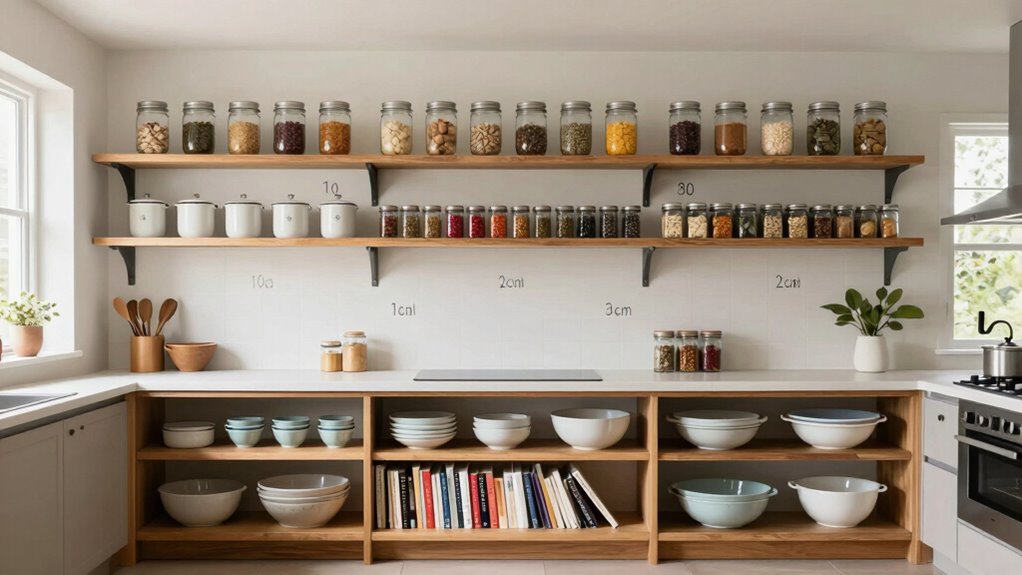
- Place frequently used items at eye level between 48-60 inches high for easy access.
- Install shelves 8-12 inches apart to accommodate standard cookware and containers.
- Keep heavy items below 48 inches to prevent strain and guarantee safety.
- Maintain 6-8 inches of clearance above countertops for comfortable workspace movement.
These measurements create functional zones that help you feel more connected to your kitchen’s flow.
When shelves work with your natural movements, everything feels more intuitive and organized.
Use Vertical Space to Its Full Potential
Building on strategic shelf placement, you can maximize every inch of your kitchen by thinking beyond standard cabinet heights.
Install shelves from floor to ceiling, utilizing areas typically ignored above refrigerators or cabinets.
Use stackable containers and vertical storage solutions like tall canisters or columnar organizers.
Mount hooks on upper walls for frequently used items like aprons or tea towels.
Consider ceiling-mounted racks for seasonal items you don’t need daily access to.
Don’t forget the space beneath countertops – rolling carts or tall baskets work perfectly there.
Think systematically about what belongs where, ensuring everything has a designated vertical zone that makes sense for your cooking workflow and kitchen community.
Organize by Function and Frequency of Use
You should group items by how often you use them and what tasks they perform.
Keep daily essentials within easy reach and store seasonal or rarely-used items in harder-to-access areas.
This approach maximizes your kitchen’s efficiency while minimizing the time spent searching for tools.
Functional Zones
One key strategy for maximizing your small kitchen’s potential involves creating distinct functional zones based on how often you use specific items and what tasks you perform most frequently.
You’ll want to group similar activities together to streamline your workflow and reduce unnecessary movement.
- Prep zone – Keep cutting boards, knives, and mixing bowls near your counter workspace
- Cooking zone – Store pots, pans, and cooking utensils close to your stove area
- Baking zone – Organize measuring cups, mixing bowls, and baking sheets together
- Cleanup zone – Position dish soap, sponges, and drying mats near your sink
This systematic approach helps you feel more organized and confident in your kitchen space.
Daily Essentials Access
After establishing functional zones in your small kitchen, focus on placing everyday items where you can reach them quickly.
Keep frequently used items at eye level and within arm’s reach. Store your favorite coffee mug, everyday spices, and cooking oil in the most accessible spots.
Place items you use daily on open shelves closest to your workspace. Reserve less frequently used items for higher or lower shelves.
Group similar items together – keep all baking supplies in one area, cooking tools in another.
This systematic approach guarantees you spend less time searching and more time cooking. Your kitchen should work for you, not against you.
Styling Tips for a Cohesive Look
How do you create visual harmony in a small kitchen without sacrificing functionality? You need systematic styling that makes everything look intentional and organized.
- Group similar items together – Cluster matching mugs, bowls, or spices in designated zones.
- Use consistent containers – Choose identical jars, canisters, or baskets for a unified appearance.
- Limit your color palette – Stick to two or three coordinating colors throughout your shelving.
- Create vertical symmetry – Arrange tallest items at back, shortest at front for clean sightlines.
These strategies help you achieve that curated look while maintaining easy access to daily essentials.
Your kitchen becomes both beautiful and belonging-worthy.
How to Maintain Clean, Dust-Free Shelves
While keeping your shelves clean and dust-free may seem like a constant battle, establishing a regular maintenance routine prevents buildup and preserves your kitchen’s organized appearance.
You should wipe down shelves weekly with a damp cloth, tackling crumbs and spills immediately. Store items in containers with tight-fitting lids to minimize dust accumulation.
Group similar items together so cleaning around them becomes simpler. Use shelf liners that you can easily remove and wash. Position frequently used items at eye level where they’re less likely to collect dust.
Move items closer to walls rather than letting them extend over shelf edges. Clean from top to bottom, working systematically across each shelf.
Vacuum crevices monthly. This consistent approach keeps your space feeling fresh and well-maintained.
Creative Storage Solutions for Limited Space
Maximize your small kitchen’s potential with these strategic storage solutions that transform cramped spaces into efficient work areas.
You’ll discover how smart organization creates a sense of belonging in your cooking space.
- Install vertical wall-mounted racks to store pots, pans, and cutting boards without occupying counter space.
- Use magnetic strips for knives and metal spices, keeping frequently-used items accessible.
- Add adjustable shelf dividers to create customized compartments for different sized items.
- Mount hooks inside cabinet doors to hang measuring cups, oven mitts, and small utensils.
These solutions work together to maximize every inch while maintaining easy access to essentials.
You’ll feel more connected to your kitchen space when everything has its place.
Essential Tools for Open Shelf Organization

You’ll need clear storage containers that stack efficiently to maximize your open shelf space.
Set up a simple labeling system so everything stays organized and easy to find.
Choose multi-functional shelving solutions that work double duty, like hooks beneath shelves or adjustable heights.
Essential Storage Containers
Clear storage containers transform your open shelves from chaotic catch-alls into organized systems.
You’ll create visual harmony while maximizing every inch of space.
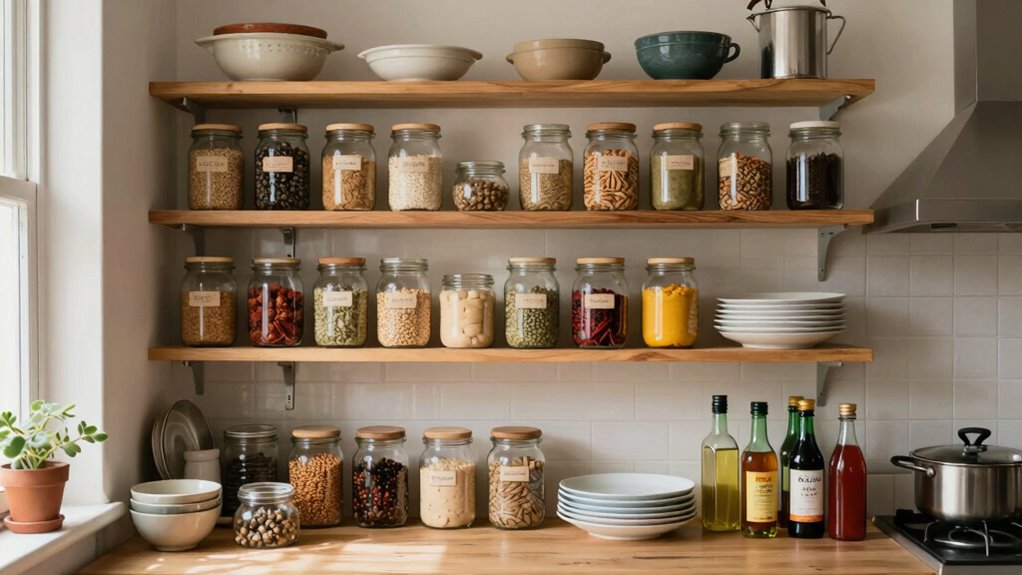
- Glass jars – Store dry goods like rice, pasta, and spices while maintaining visibility
- Stackable bins – Group similar items together for quick identification
- Basket sets – Contain smaller items like tea bags or snack packets
- Modular containers – Adapt to different shelf sizes and changing needs
Choose uniform shapes that stack efficiently.
Clear materials let you see contents instantly, reducing time spent searching.
These containers become your organizational foundation, creating a kitchen that feels both functional and cohesive.
You belong in a space that works smarter, not harder.
Labeling System Setup
A well-designed labeling system eliminates guesswork and maintains order across your organized storage containers. You should choose consistent label sizes and fonts for visual harmony.
Print waterproof labels for durability in your kitchen environment. Position labels at eye level for easy identification. Use clear, concise descriptions rather than generic terms.
Color-code labels by category: grains, spices, baking supplies. Invest in a quality label maker or printable labels for professional results.
Apply labels immediately after filling containers to avoid confusion. Update labels when contents change. Group similar items together and label the entire section.
This systematic approach guarantees everyone in your household can maintain the organization you’ve created.
Multi-Functional Shelving Solutions
Having established a reliable labeling system for your containers, you can now maximize your kitchen’s vertical space with strategic shelving solutions.
Multi-functional shelves transform cramped cooking areas into efficient workspaces while keeping everything visible and accessible.
- Adjustable shelf brackets let you customize spacing based on container heights
- Tiered shelf units create multiple storage levels within minimal footprint
- Mobile shelving carts provide flexible storage that moves where needed
- Wall-mounted corner shelves utilize awkward spaces others ignore
These solutions work together, creating zones for different kitchen tasks.
You’ll find your rhythm quickly, moving between prep areas and storage without wasted steps.
Everyone deserves a kitchen that supports their cooking style while staying organized.
Common Mistakes to Avoid With Open Shelving
Open shelving can quickly become overwhelming when you don’t plan your organization strategy.
You’ll waste time rearranging items repeatedly without a clear system. Don’t overcrowd shelves with everything you own – this creates visual chaos and makes finding items difficult.
Avoid mixing too many textures, colors, or heights without purposeful grouping. Keep frequently used items at eye level and within easy reach.
Don’t forget about dust accumulation; regularly clean exposed items and surfaces. Store pantry goods in matching containers for a cohesive appearance.
Avoid placing messy or unsightly items where they’re visible. Group similar items together logically.
Don’t treat open shelving like closed cabinets – visibility demands more thoughtful curation and maintenance.
How to Make Open Shelves Kid-Friendly
While designing open shelves for kids, prioritize safety and accessibility over aesthetics. You want your children to feel included in the kitchen space while staying protected.
- Install shelves at child-friendly heights – Place frequently used items within their reach so they can participate in daily activities independently.
- Secure heavy items – Anchor appliances and tall objects to prevent tipping accidents that could cause serious injuries.
- Use soft-close mechanisms – Install cushioned shelf edges and door stops to prevent pinched fingers and loud bangs.
- Create designated kid zones – Reserve specific shelves for children’s dishes, snacks, and cooking tools they can safely access.
These adjustments help children feel welcomed and valued in your kitchen community.
Lighting Ideas to Highlight Your Shelves
You can transform your open shelves into functional display areas by installing LED strip lights underneath each shelf to eliminate shadows and showcase your items properly.
Adding dimmer switches lets you adjust the brightness based on your needs, whether you’re cooking or creating ambiance for entertaining.
Puck lights work perfectly for spotlighting specific items like cookbooks or decorative pieces that you want to emphasize.
LED Strip Lights Under Shelves
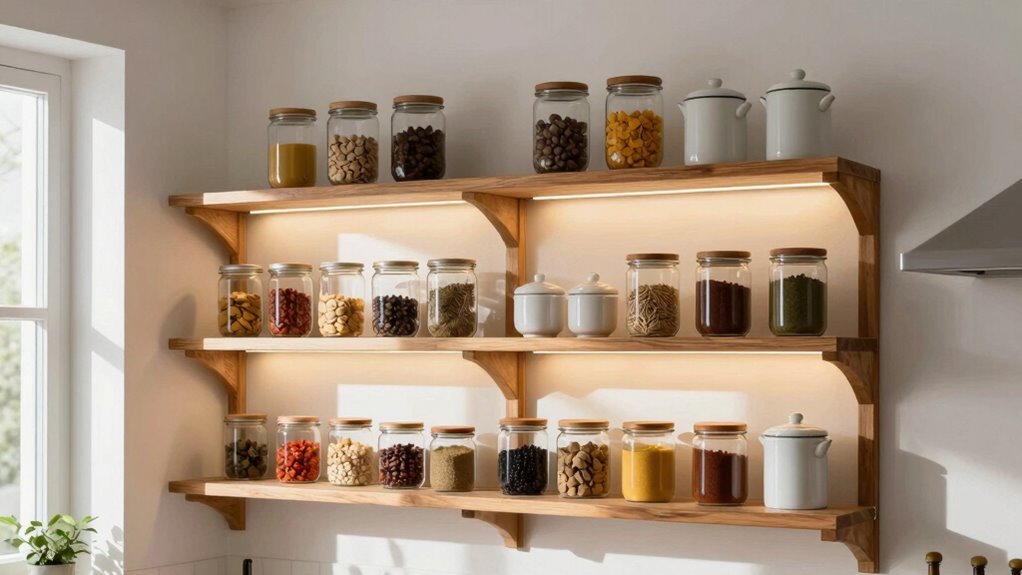
Installing LED strip lights under your shelves transforms a small kitchen by creating visual depth and making items easier to find. You’ll enhance both functionality and aesthetics while maximizing your limited space.
- Choose warm white LEDs – They create inviting atmosphere and accurately show food colors.
- Measure shelf lengths precisely – Cut strips to exact dimensions for clean, professional appearance.
- Install motion sensors – Automatically illuminate contents when you approach, adding convenience.
- Use adhesive backing – Eliminates complicated wiring while ensuring secure attachment.
These lights eliminate dark corners where items get lost. You’ll quickly locate spices, oils, and cookware without rummaging.
The gentle glow makes your kitchen feel welcoming rather than sterile. Friends and family will appreciate how easy it’s to find what they need.
You’re creating a space where everyone wants to gather and cook together.
Install Dimmer Switches for Ambiance
Dimmer switches let you adjust lighting levels to suit any kitchen task or mood. You’ll create versatile ambiance that makes your open shelving feel welcoming.
Start by choosing dimmable LED bulbs that complement your kitchen’s color scheme. Install dimmer switches near your main light sources, ensuring they’re easily accessible.
Test different brightness levels throughout the day to see how natural light affects your space. Lower settings work perfectly for cozy evening meals, while brighter levels help when preparing food.
You’ll discover that controlling light intensity makes your kitchen feel more intimate and personalized. This simple upgrade transforms your shelving display into a warm, inviting focal point that reflects your unique style and creates belonging in your small kitchen space.
Use Puck Lights to Spotlight Items
Puck lights add focused illumination where dimmer switches provide overall ambiance. You can strategically place these compact LED lights to highlight your most treasured kitchen items while creating visual interest on open shelves.
Consider these key placement strategies:
- Position lights above frequently used spices or oils for quick identification.
- Install them beneath shelf edges to eliminate shadows and improve visibility.
- Use warm white bulbs (2700K-3000K) for flattering food presentation.
- Choose battery-operated or hardwired options based on your electrical setup.
You’ll discover that puck lights transform your kitchen’s functionality while showcasing your curated collection.
These versatile fixtures work especially well highlighting colorful dishes, fresh herbs, or artisanal ingredients. You can easily adjust positioning seasonally or rearrange displays without complicated rewiring.
The focused beams draw attention exactly where you need it most.
Budget-Friendly Open Shelving Options
Why settle for expensive custom shelving when you can create functional open storage on a dime?
You’ll find affordable bracket systems at hardware stores for under fifty dollars. Wooden boards from lumber yards work perfectly as shelves when cut to size. Floating shelf kits offer sleek looks without breaking your budget.
Consider repurposing old cabinet doors or barn wood for rustic charm. Wire shelving units adapt easily and cost pennies compared to new installations. Don’t overlook garage sale finds or Facebook Marketplace deals on gently used shelving.
Measure your space carefully before purchasing materials. Mix different textures like metal and wood for visual interest. Paint existing shelves instead of replacing them entirely.
These budget-friendly solutions give you organized storage while keeping money in your pocket.
Real-Life Examples of Stylish, Organized Kitchens
While you’re planning your small kitchen organization, studying real-life examples can provide practical inspiration for maximizing your space efficiently.
You’ll discover how others successfully balance style with functionality in compact areas.
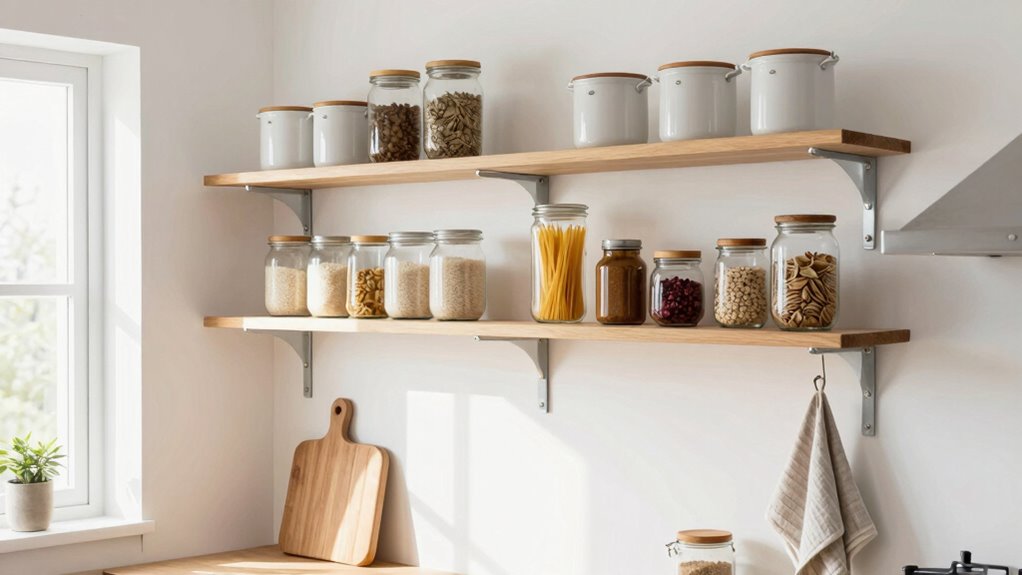
- Vertical storage solutions – Wall-mounted racks and tall shelving units draw eyes upward, making spaces feel larger while storing essentials within reach.
- Multi-functional furniture – Rolling carts and islands with built-in storage serve double duty as prep surfaces and hidden compartments.
- Color-coordinated systems – Matching containers and uniform labeling create visual harmony while maintaining organization.
- Zone-based arrangement – Grouping similar items by function streamlines daily cooking routines and reduces decision fatigue.
These examples demonstrate that small kitchens can be both beautiful and highly functional.
Conclusion
Transform your small kitchen into a functional oasis with open shelving that breathes life into every corner. Like a well-conducted orchestra, each item finds its perfect position, creating harmony between form and function. Your shelves become a canvas where organization meets artistry, turning daily chaos into seamless rhythm.
")