You might be surprised to learn that your kitchen’s most convenient appliance often becomes its messiest. Microwave cleaning seems like a chore, but what if you could tackle it with items already in your pantry? Keep going to discover the simple, natural methods that will save you time and money.
Why Choose Natural Over Chemical Cleaners

While chemical cleaners may seem effective, natural alternatives offer significant advantages for microwave cleaning.
You’ll discover that vinegar, lemon juice, and baking soda tackle grease and food splatters without leaving harsh residues. These ingredients work synergistically to break down stubborn stains while eliminating odors naturally.
You’re not exposing your family to potentially harmful fumes or synthetic fragrances that linger after cleaning. Natural methods prove equally effective at removing baked-on food particles and sanitizing surfaces.
You’ll appreciate how these gentle yet powerful solutions protect your microwave’s interior while maintaining air quality in your kitchen.
Making the switch to natural cleaning creates a healthier environment for everyone. You’re choosing safer, sustainable options that deliver professional results without compromising your family’s wellbeing or the planet’s health.
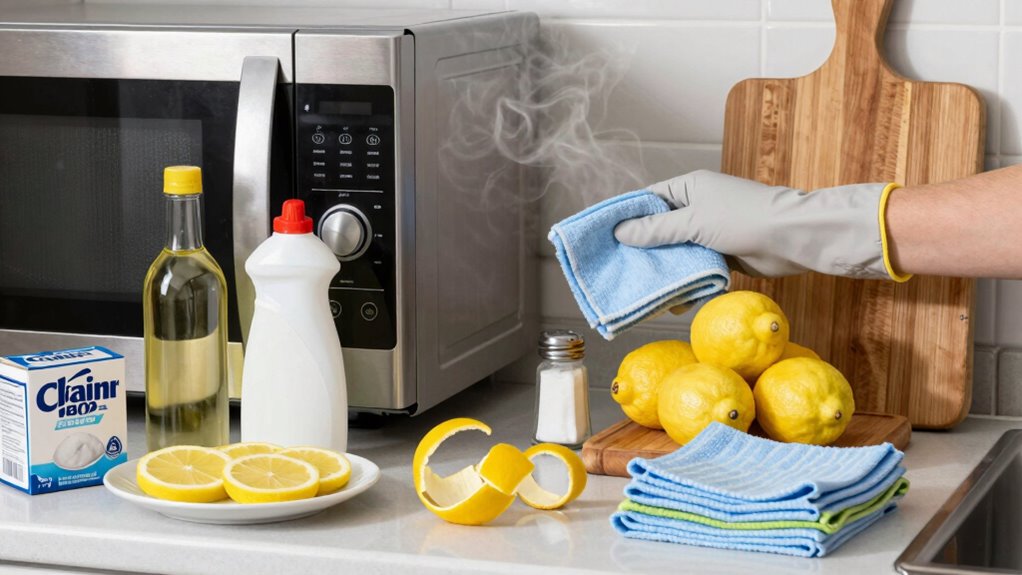
Gather These Simple Kitchen Ingredients First
You’ll need three common kitchen ingredients before starting: lemon juice cuts through grease effectively, white vinegar eliminates odors naturally, and baking soda removes stubborn stains safely.
These items work better together than most commercial cleaners while costing pennies compared to chemical alternatives.
Gather them now so you’re ready to clean your microwave thoroughly without leaving harmful residues behind.
Lemon Juice For Grease
A few simple ingredients from your kitchen can effectively cut through stubborn microwave grease.
Lemon juice works wonders on greasy buildup because its natural acidity breaks down油腻 residues.
You’ll need fresh lemons or bottled lemon juice, water, and a microwave-safe bowl.
Mix equal parts lemon juice and water in the bowl. Heat this solution for two minutes until it steams.
Let it sit for five minutes to allow the citrus steam to loosen grease particles.
Remove the bowl carefully and wipe interior surfaces with a damp cloth.
The lemon juice penetrates grease quickly, making stubborn spots easier to remove.
For heavy grease buildup, increase the lemon juice concentration.
This method works better than harsh chemicals while leaving your microwave smelling fresh.
You’re using ingredients you already have, making this approach both economical and environmentally friendly.
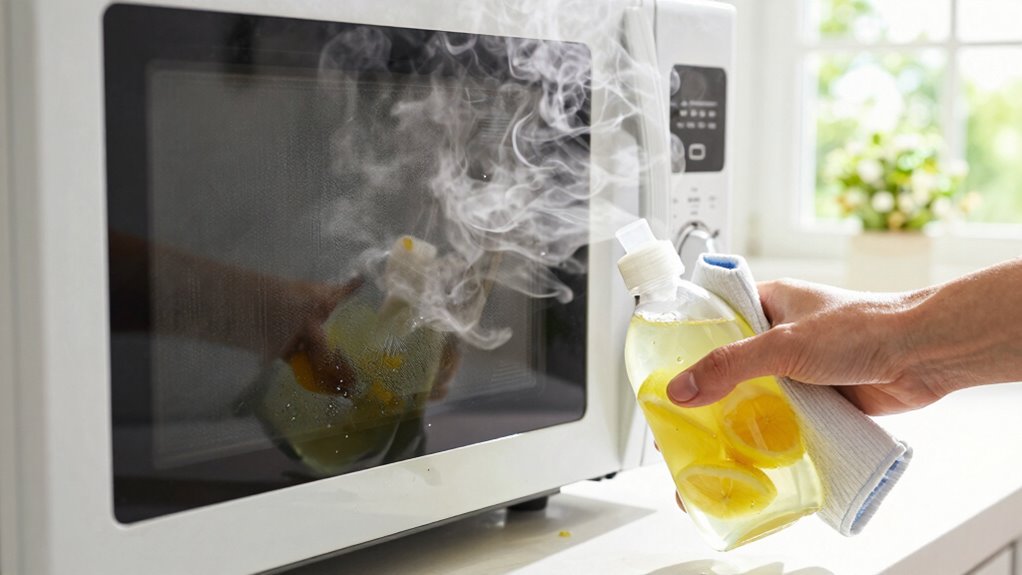
White Vinegar For Odors
One effective method for eliminating microwave odors uses white vinegar’s natural deodorizing properties. You’ll need white vinegar and water in equal parts.
Pour this mixture into a microwave-safe bowl and heat it for two to three minutes until it boils. Let it sit in the microwave for ten minutes with the door closed. The steam penetrates and neutralizes odor-causing molecules trapped on surfaces.
You’re targeting stubborn smells from reheated foods, garlic, or fish that regular cleaning misses. After the waiting period, carefully remove the hot bowl and wipe down interior surfaces with a clean cloth.
The vinegar smell dissipates quickly, leaving your microwave fresh. This method works because vinegar’s acidity breaks down alkaline odor compounds, effectively eliminating them rather than just masking smells.
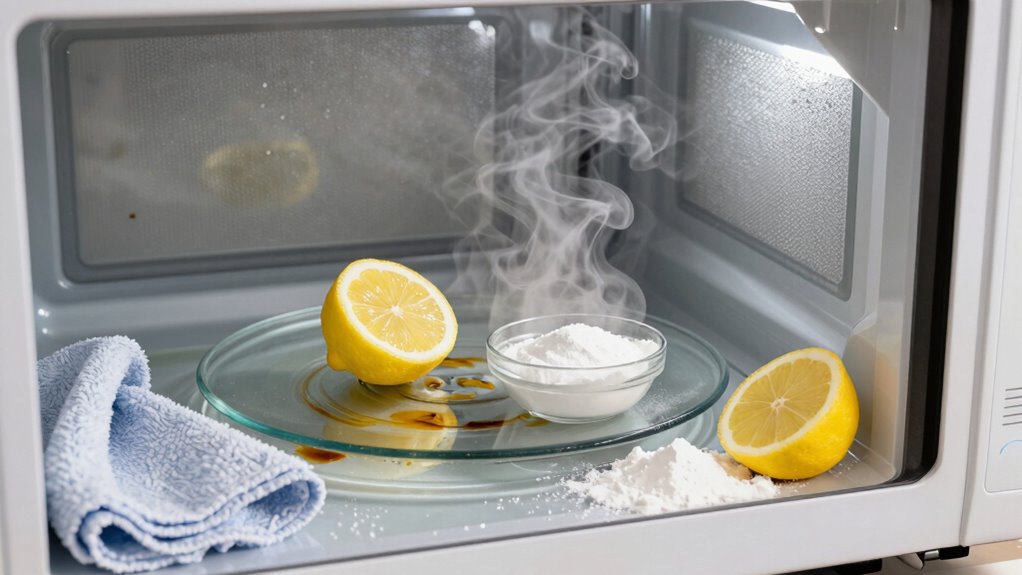
Baking Soda For Stubborn Stains
Baking soda tackles tough microwave stains that regular cleaning can’t remove.
You’ll need this common household ingredient for stubborn food residue and splatters. Mix baking soda with water to create a paste that lifts dried-on messes effectively.
Apply the paste directly to stained areas inside your microwave. Let it sit for several minutes so the baking soda can break down tough grime. Scrub gently with a damp cloth or sponge, then wipe clean with fresh water.
This method works especially well on protein-based stains from eggs or cheese.
You’re probably already familiar with baking soda’s cleaning power from other household tasks. Its gentle abrasiveness makes it safe for microwave surfaces while still removing stubborn stains others might struggle with.
Easy Lemon-Steam Method for Quick Cleaning
You’ll start by preparing fresh lemon juice and water mixture,
then heat it to create steam that naturally loosens stubborn food particles.
The steaming process takes just a few minutes and requires no harsh chemicals or scrubbing pads.
This method also leaves your microwave smelling fresh while effectively sanitizing the interior surfaces.
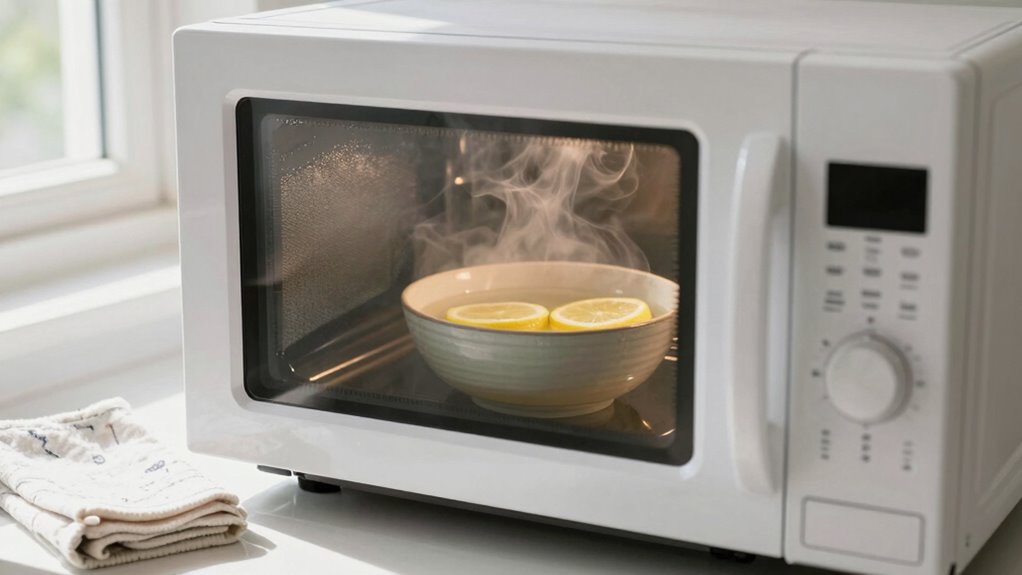
Lemon Juice Preparation
After cutting a lemon in half, squeeze the juice into a microwave-safe bowl filled with water, then place both lemon halves into the bowl.
You’re creating a natural cleaning solution that’s both effective and safe for your kitchen. The citric acid in lemon juice cuts through grease and grime while leaving behind a fresh scent.
Make certain you use enough juice – about two tablespoons works well for most microwaves. The water helps distribute the lemon’s cleaning power evenly throughout the microwave cavity.
This preparation method guarantees you’re ready for the next step without wasting ingredients. Your homemade cleaner rivals expensive products while being gentle on surfaces.
You’ll feel confident knowing exactly what’s cleaning your appliance.
Steam Cleaning Process
One effective method for tackling microwave grime involves harnessing the power of steam generated from your lemon-water solution.
Place the bowl inside your microwave and heat it on high for three to five minutes until boiling water creates thick steam.
Let it sit undisturbed for another five minutes so steam loosens stubborn food particles and grease buildup.
You’ll notice how effectively this simple steam treatment breaks down tough stains without harsh scrubbing.
The citric acid works synergistically with heated vapors to dissolve residues effortlessly.
After waiting, carefully remove the hot bowl using oven mitts.
Wipe down all interior surfaces with a clean cloth or paper towel.
This steam cleaning approach delivers remarkable results quickly while maintaining your microwave’s pristine condition naturally.
Natural Deodorizing Method
While heating lemon water in your microwave creates steam that loosens stubborn grime, this same process simultaneously eliminates odors naturally.
You’ll achieve fresh-smelling results without harsh chemicals. Fill a microwave-safe bowl with one cup of water and squeeze half a lemon into it. Place the bowl inside and heat on high for three minutes. The citrus steam penetrates every corner, neutralizing unpleasant smells from leftover food particles.
Allow the mixture to sit for five minutes before carefully removing it. Wipe down interior surfaces with a damp cloth. The natural acidity breaks down odor-causing bacteria while leaving behind a clean, invigorating lemon scent that makes your kitchen feel welcoming.
Get Rid of Grease & Spills With Baking Soda Paste
Mix baking soda with a small amount of water to create a thick paste that you can easily spread.
Apply this paste directly onto greasy spots and food spills inside your microwave. Let it sit for several minutes so the baking soda can break down stubborn residue.
Scrub gently with a damp cloth or sponge, then wipe away all traces of the paste. You’ll find that even the toughest grease and food buildup dissolves quickly.
This method works because baking soda’s alkaline properties cut through acidic food particles and oils.
Repeat the process if necessary for heavily soiled areas. Clean the interior walls, ceiling, and turntable thoroughly.
You’re restoring your microwave to like-new condition naturally.
Neutralize Lingering Odors Using White Vinegar

You can eliminate stubborn microwave odors using a simple vinegar steam treatment.
Mix equal parts white vinegar and water in a microwave-safe bowl, then heat it for several minutes until the solution creates steam throughout the appliance.
This process naturally neutralizes lingering smells without harsh chemicals.
Vinegar Steam Treatment
Because white vinegar effectively neutralizes stubborn odors through its acidic properties, this natural steam treatment provides an excellent solution for eliminating lingering smells in your microwave.
You’ll need white vinegar and water in equal parts. Pour this mixture into a microwave-safe bowl and place it inside your microwave. Heat on high for three to five minutes until the solution boils and creates steam.
The steam penetrates every corner, breaking down odor-causing molecules trapped in your appliance. You’re accomplishing deep cleaning without harsh chemicals.
Let the mixture sit undisturbed for several minutes after heating. The vinegar steam works systematically to dissolve grease and eliminate smells.
This method integrates seamlessly into your regular cleaning routine, ensuring your microwave stays fresh naturally.
Odor Elimination Process
While white vinegar’s acidic properties make it an effective solution for neutralizing stubborn odors, the steam treatment process requires careful attention to achieve ideal results.
You’ll need to create a vinegar-water mixture using equal parts of each liquid. Place this solution in a microwave-safe bowl and heat it on high for three to five minutes until boiling. The generated steam penetrates every corner, breaking down odor-causing molecules clinging to surfaces.
Allow the mixture to sit inside your microwave for several minutes after heating. This waiting period guarantees maximum odor absorption. You’ll notice immediate improvement after the first treatment, but heavily saturated microwaves might need repeated applications.
Always let the steam dissipate naturally rather than opening the door immediately, guaranteeing you achieve complete odor elimination throughout your appliance.
Wipe Down Walls, Ceiling, and Glass Safely
Most microwave interiors require gentle cleaning methods that won’t damage surfaces or leave harmful residues. You should use a soft cloth or sponge dampened with warm water and mild dish soap.
Avoid abrasive cleaners or harsh chemicals that can etch glass or plastic components. Wipe down all interior walls, paying special attention to corners where food particles accumulate. Clean the ceiling area thoroughly, as steam often condenses there.
Don’t forget the door’s inner surface and handle, which harbor bacteria from frequent contact. Rinse your cloth frequently to prevent spreading grime.
Dry surfaces completely before closing the door. This prevents water spots and maintains your appliance’s appearance while ensuring safe, hygienic cooking conditions for your household.
Tackle That Dirty Turntable Efficiently
The turntable is one of the most overlooked yet essential components requiring regular cleaning. You should remove it carefully and wipe down with a damp cloth.
For stubborn stains, create a paste using baking soda and water. Apply gently, then scrub in circular motions. Don’t forget to clean underneath where food particles accumulate.
Rinse thoroughly with warm water afterward. Dry completely before reinserting. Regular maintenance prevents buildup that’s harder to remove later.
You’ll maintain better hygiene and extend your microwave’s lifespan. Make this simple step part of your routine cleaning schedule.
Your kitchen will thank you for keeping this often-neglected area spotless and bacteria-free.
What Frequency Keeps Microwaves Spotless Long Term?
Regularly cleaning your microwave prevents stubborn buildup and maintains peak performance. You should aim to wipe down the interior weekly using a damp cloth or sponge.
Monthly deep cleaning with natural ingredients like lemon juice or white vinegar removes lingering odors and residue effectively.
Don’t wait for visible messes to accumulate before taking action. Consistent maintenance prevents food particles from hardening into difficult stains.
Your microwave works harder when food splatters build up, reducing efficiency over time.
Establishing a routine keeps your appliance functioning effectively while extending its lifespan. You’ll notice better heating performance and eliminate embarrassing microwave odors.
Think of regular cleaning as an investment in your kitchen’s hygiene standards.
Make it part of your weekly routine – your future self will thank you for maintaining those spotless conditions long-term.
Smart Ways to Prevent New Messes Fast
Prevention saves you time and effort compared to tackling baked-on messes later.
You should cover foods with microwave-safe lids or paper towels to contain splatters immediately. Wipe down the interior after each use while it’s still warm but safe to touch.
Place a microwave-safe bowl of water with lemon slices inside during heating to loosen food particles naturally. You’ll want to rotate and stir foods midway through cooking to prevent overflow.
Check containers for microwave-safe labels to avoid melting or warping that creates additional mess. Use glass or ceramic bowls instead of plastic when possible.
You should clean up minor spills within minutes rather than letting them cool and harden. These simple habits keep your microwave looking pristine without constant deep cleaning sessions.
Avoid These DIY Mistakes That Ruin Results
While maintaining clean habits helps prevent buildup, common DIY cleaning errors can actually damage your microwave or leave behind stubborn residues.
You shouldn’t use abrasive scrubbers or steel wool, which scratch interior surfaces. Avoid harsh chemicals like bleach or ammonia that react poorly with microwave components.
Don’t ignore food splatters that harden over time – they become nearly impossible to remove naturally. Never clean while the microwave is still warm, as rapid temperature changes cause cracking.
You mustn’t spray liquids directly inside, creating electrical hazards. Skip using excessive water, which can damage electronic components. Don’t forget to unplug before cleaning.
Avoid using dirty sponges or cloths that spread bacteria. You shouldn’t rush the steaming process, preventing effective cleaning.
Finally, don’t neglect regular maintenance – waiting too long makes natural cleaning methods ineffective.
Weekly Habits for a Continuously Clean Appliance
Establishing consistent weekly cleaning routines guarantees your microwave stays fresh and prevents stubborn buildup that requires intensive scrubbing.
You’ll maintain a hygienic cooking environment while extending your appliance’s lifespan.
- Wipe down interior surfaces immediately after each use to remove food splatters and prevent hardened stains.
- Deep clean with steam once weekly using a bowl of water and lemon juice, letting it sit for several minutes before wiping clean.
- Inspect and clean the turntable regularly, removing any food debris or sticky residue that accumulates underneath.
- Check door seals monthly for trapped food particles that can harbor bacteria and affect appliance performance.
These simple habits guarantee your microwave remains spotless and functional.
Conclusion
Keep your microwave spotless without harsh chemicals. These simple, natural methods work better than expensive cleaners your grandmother never needed. Regular steam cleaning with vinegar and lemon removes buildup naturally. Baking soda paste tackles tough stains effortlessly. Maintain cleanliness weekly with these easy techniques. Your microwave stays fresh, safe, and chemical-free when you follow these time-tested approaches consistently.
")