You don’t need a thermometer to master meat doneness—you can rely on your senses instead. Watch as beef transforms from crimson to brown, or chicken shifts from pink to white. Feel the firmness that signals perfect cooking. These visual and tactile cues are your gateway to consistently juicy results, but there’s more to master than just color and touch.
Detect Doneness by Watching Color Change
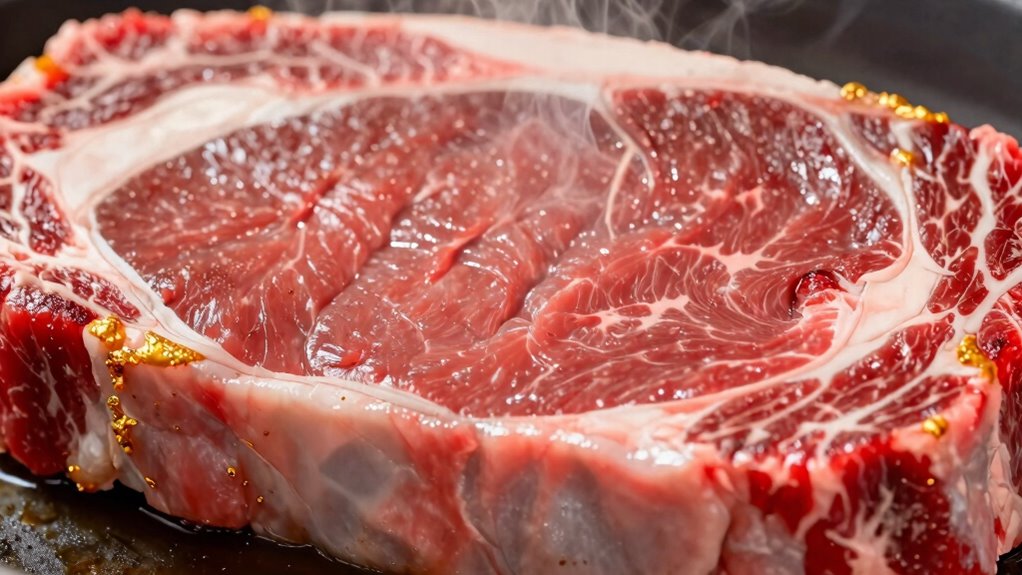
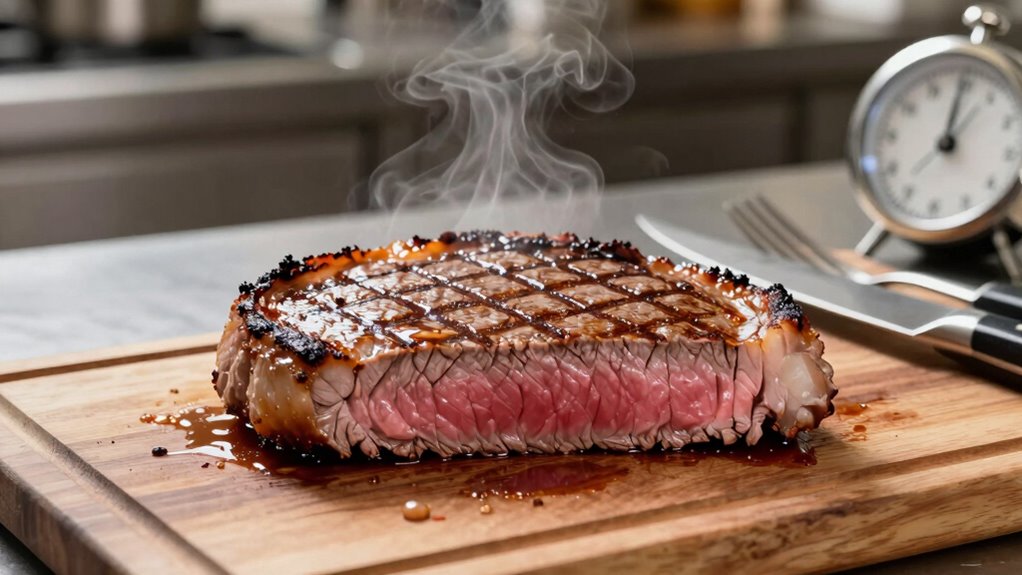
How do you know when meat has reached the perfect level of doneness without cutting into it? You watch for color transformation. Beef changes from bright red to pinkish-brown as it cooks.
Pork shifts from pale pink to beige. Chicken transforms from pink to white throughout. These visual cues tell you everything.
Look for surface browning too. That caramelized exterior means proper searing and development of flavor. You belong in the kitchen when you understand these signs.
Check meat edges first. They’ll show color changes before centers do. Surface moisture evaporating indicates proper cooking progress.
Trust these visual signals. They’re reliable indicators that eliminate guesswork. Your family will taste the difference when you master this technique.
Use Touch to Feel Firmness and Juiciness
Feeling the meat’s texture with your fingers provides immediate feedback that visual cues alone can’t offer. Press firmly but gently against the surface, sensing resistance and springiness.
Rare meat feels soft and yielding, bouncing back slowly when pressed. Medium meat offers more resistance, feeling firmer yet still yielding slightly. Well-done meat feels dense and tough, providing significant resistance to pressure.
Don’t press too hard initially; you’ll develop sensitivity with practice. Feel for moisture content too – properly cooked meat should feel juicy, not dry or overly firm.
Your fingertips become your most reliable tool, delivering real-time information about internal texture changes. This tactile method works especially well for steaks, burgers, and chicken breasts, giving you confidence that your cooking technique is hitting the mark every time.
Time Each Cut Right to Prevent Overcooking
Every cut of meat requires specific timing to reach ideal doneness without crossing into overcooked territory.
You must understand that thinner cuts like chicken breast or pork chops need only 3-4 minutes per side, while thicker steaks demand 6-8 minutes depending on your desired doneness. Ground meats cook fastest, usually within 3-5 minutes, but you can’t press them down or they’ll lose juices.
Fish fillets need gentle heat for just 2-3 minutes per side. Remember that carryover cooking continues even after you remove meat from heat, so factor in 5-10 minutes resting time.
You’re not just timing cooking sessions; you’re developing intuition for when meat transforms from raw to perfectly cooked, creating that satisfying moment when everything comes together exactly right.
Match Cooking Methods to Meat Types
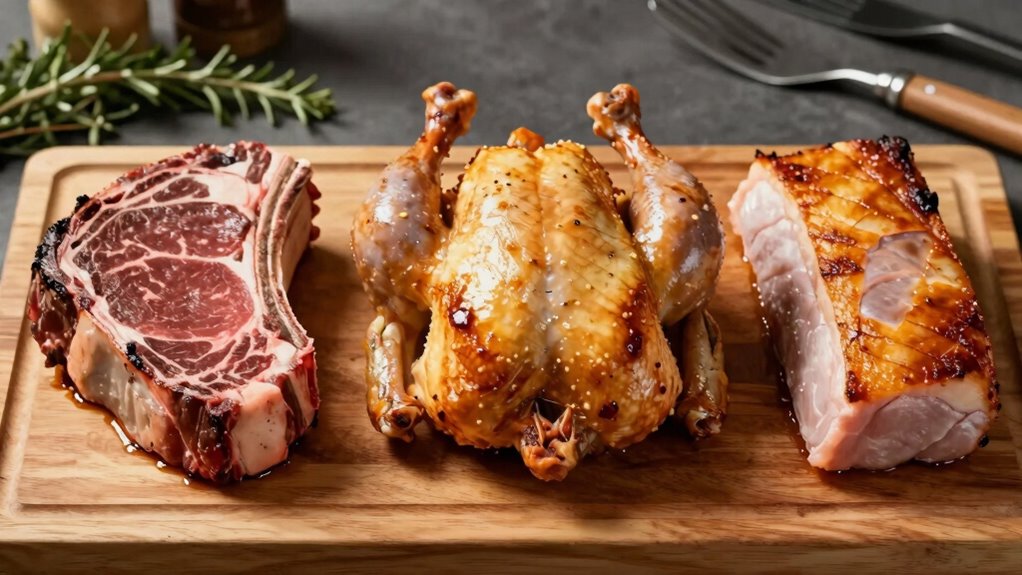
While you might be tempted to use the same cooking method for all your meats, different types require specific approaches to achieve ideal results. You should match your technique to each cut’s unique characteristics.
Tenderloin and ribeye respond beautifully to high-heat searing followed by gentler cooking. Tougher cuts like chuck roast demand slow, moist heat methods like braising.
Poultry benefits from consistent medium heat, while fish requires careful attention to avoid overcooking. Ground meats need thorough cooking through browning and simmering.
You’re not just cooking meat—you’re respecting its natural structure. Each type has connective tissues, fat content, and muscle fibers that respond differently to heat.
Understanding these differences makes you part of an informed cooking community that consistently achieves perfect results without guesswork.
Try the Finger Test for Instant Feedback
You can quickly gauge meat doneness by pressing firmly on the surface with your finger, feeling for the firmness that indicates proper cooking temperature.
Pay attention to how the meat springs back when pressed – rare meat feels soft and squishy while well-done meat feels firm and bounces back immediately.
This tactile method works alongside visual cues like color changes and texture shifts to give you real-time feedback without needing a thermometer.
Touch Test Accuracy
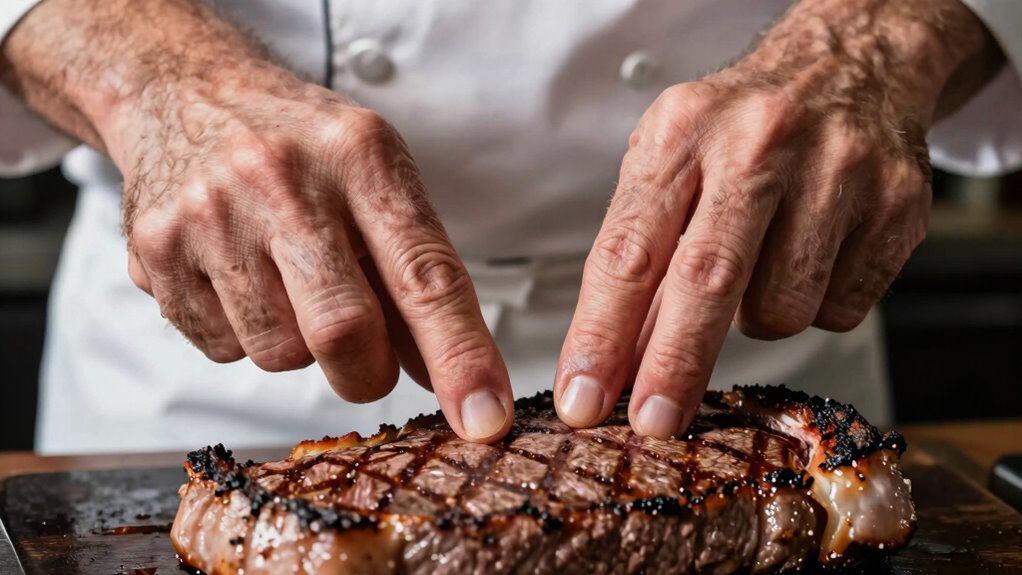
One reliable method for determining meat doneness doesn’t require a thermometer or timer—it’s the finger test, and anyone can master this tactile skill with practice.
You’ll press the meat gently with your finger, feeling for resistance that indicates protein firmness. Rare meat feels soft and yielding, similar to the flesh between your thumb and forefinger when making an “OK” sign.
Medium meat offers more resistance, like pressing your chin. Well-done meat feels firm, matching the tension in your forehead when you raise your eyebrows.
Your finger becomes your instant meat analyzer, providing immediate feedback about internal texture.
This method works because proteins tighten progressively as they cook, changing the meat’s tactile properties.
You’re not guessing—you’re feeling scientific changes happening within the muscle fibers, connecting you to centuries of cooking wisdom.
Visual Texture Clues
Visual cues become your ally in the kitchen when you’re monitoring meat texture, and combining these observations with the finger test gives you immediate, reliable feedback.
Press your finger against the meat’s surface; it should feel firm but yielding. Undercooked meat feels soft and squishy, while overcooked meat becomes tough and rubbery.
Look for color changes – pinkness fading to brown indicates proper doneness. Surface texture matters too; properly cooked meat develops a slightly firmer exterior.
Watch for juice color running clear rather than pink or red. Trust your senses; your fingertip pressure readings, combined with visual assessment, create a reliable monitoring system.
Practice this technique with different cuts to develop your intuition. You’re joining a community of cooks who’ve mastered this essential skill.
Spot Visual Signs That Show It’s Ready
You need to watch for distinct color changes that signal doneness, from red to pink to brown depending on your desired outcome.
Check the meat’s surface texture and firmness with your eyes and finger pressure, as properly cooked meat will spring back when pressed.
Notice the color of juices that seep from the meat, since clear or pale yellow juices indicate readiness while pink or red juices mean it needs more time.
Color Change Indicators
How do you know when meat has reached its ideal doneness without cutting into it?
You watch for color alteration signals that reveal internal temperature changes. Beef shifts from bright red to pinkish-brown as it cooks, with rare showing deep red centers and well-done displaying uniform brown coloring.
Pork changes from pale pink to beige or slightly golden. Poultry loses its pink hue entirely, turning white or pale yellow.
Fish flesh converts from translucent to opaque.
These visual cues happen because myoglobin proteins denature at specific temperatures, creating predictable color patterns.
You’re looking for surface browning that indicates proper searing and internal color changes that signal doneness levels.
Trust these natural indicators—they’re your roadmap to perfectly cooked meat every time.
Texture And Firmness Cues
One key indicator that meat has reached proper doneness lies in its surface texture and firmness to the touch. You’ll notice properly cooked meat feels resilient when pressed, springing back quickly rather than staying indented.
Undercooked meat feels soft and yielding, while overcooked meat becomes tough and leathery. Pay attention to how the surface looks – it should appear slightly firmer and more defined edges.
For steaks, medium-rare feels like pressing your cheek, medium like pressing your chin, and well-done like pressing your forehead. Poultry should feel firm throughout with no give when pressed.
Touch testing requires practice, so trust your fingers more than visual cues alone.
Juice Color Analysis
Why shouldn’t you rely solely on cutting into meat to check its doneness? You lose valuable juices and disrupt the cooking process. Instead, master juice color analysis for perfect results every time.
Pay attention to these visual cues:
- Clear or slightly pink juices indicate properly cooked chicken and fish
- Reddish-pink liquids mean rare to medium-rare beef needs more time
- Cloudy, white juice signals overcooked chicken
- Deep red juice suggests undercooked beef requiring additional heat
- Golden, caramelized drippings show roasting meats are nearly perfect
You’re not just guessing—you’re developing intuition through observation. These signs work especially well when grilling or pan-searing. Trust your eyes rather than constantly poking holes in your meat.
You’ll achieve restaurant-quality results while keeping all those flavorful juices intact.
Stop Rushing: Common Timing Traps to Avoid
When you’re keen to serve dinner, it’s tempting to crank up the heat and rush the cooking process, but this common mistake often leads to overcooked, tough meat.
You shouldn’t rely on arbitrary timing rules you’ve heard elsewhere – every cut cooks differently.
Don’t fall into the trap of flipping meat constantly; let it develop proper sear marks first.
Resist the urge to press down on steaks or burgers, which squeezes out juices.
Thick cuts need lower temperatures and patience, not high heat desperation.
Avoid setting timers based solely on thickness – consider starting temperature, desired doneness, and your specific cooking method.
Trust your instincts and visual cues instead of rigid minute-by-minute expectations that don’t account for variables like pan temperature or meat quality.
Let It Rest: Why This Step Matters

Pulling meat off heat immediately after cooking causes juices to escape, undoing all your careful timing efforts. You need to let it rest because the internal temperature continues rising slightly while resting, ensuring even cooking throughout. Resting allows contracted fibers to relax, retaining moisture that keeps your meat juicy and tender.
- Time matters: Rest for 5-10 minutes depending on meat thickness
- Tent with foil: Loose covering prevents excessive cooling while trapping steam
- Don’t skip this: Resting transforms good cooking into great results
- Juice retention: Allows redistributed juices to settle back into meat fibers
- Temperature equalization: Heat distributes evenly from outside to center
Resting isn’t just waiting—it’s active participation in achieving perfect doneness. You’re not just cooking meat; you’re crafting an experience others will remember and want to repeat.
Don’t Ignore These Simple Doneness Mistakes
You should master simple visual cues like color changes and juice clarity to judge meat doneness accurately.
Your touch test methods must be precise – press firmly but briefly to assess firmness progression from rare to well-done.
These basic techniques prevent guesswork that leads to overcooked, dry meat every time.
Simple Visual Cues
How exactly can you tell when your meat has reached the perfect level of doneness without cutting into it?
You need to master these visual indicators that separate novice cooks from seasoned pros.
Pay attention to these vital signs:
- Color changes: Meat darkens as it cooks; beef turns from red to brown, poultry loses its pink hue.
- Juice color: Clear or pale yellow juices indicate doneness, while pink or red suggest more cooking time.
- Surface texture: Properly cooked meat develops a firm, slightly crusty exterior.
- Fat rendering: Visible fat should melt and crisp, not remain soft and waxy.
- Steam patterns: Reduced steam signals meat approaching ideal temperature.
These visual cues become second nature with practice, helping you achieve consistent results every time.
Touch Test Methods
While visual cues provide valuable information about meat doneness, mastering the touch test separates good cooks from great ones. You should press meat gently with your finger or tongs to gauge firmness.
Rare meat feels soft and spongy, similar to the flesh between your thumb and index finger when you touch them together. Medium meat offers more resistance, like pressing your chin. Well-done meat feels firm and springy, matching the tension at the base of your thumb when you make a fist.
Don’t press too hard or you’ll compress the meat. Test multiple spots since thickness varies. Remember, practice makes perfect—you’ll develop muscle memory quickly.
Your finger becomes your most reliable tool when thermometers aren’t available. Trust this tactile feedback.
Fix Dryness Before Serving Every Time
Why does meat turn dry in the first place? Overcooking causes moisture loss and protein contraction, leaving you with tough, unappetizing results.
Don’t let this ruin your meal – fix dryness every time.
- Add moisture back with butter, oil, or broth before serving
- Slice against the grain to break tough fibers naturally
- Marinate beforehand using acidic ingredients like lemon or vinegar
- Use carryover cooking by removing meat 5-10 degrees early
- Let it rest for 3-5 minutes after cooking to redistribute juices
These techniques transform dry meat into tender, juicy portions.
You belong in the kitchen confident that every dish turns out perfectly. Master these fixes and impress everyone at your table.
Conclusion
Like a skilled conductor reading an orchestra, you must watch meat’s color symphony—red to brown, pink to white. Feel its texture like a sculptor sensing clay firmness. Time each cut precisely, matching methods to meat types. Don’t rush the process; let rest time work its magic. Avoid common timing traps and fix dryness immediately. Master these techniques, and you’ll conduct perfect doneness every time.
")