You’ve probably stared at that cramped under-sink chaos wondering where to start – like trying to fit a week’s worth of groceries into a overstuffed fridge. Don’t tackle this blindly; you’ll waste time moving items around without purpose. Instead, let’s transform that cabinet into a functional space where everything has its place and leaks won’t ruin your day. Ready to finally make sense of that plumbing nightmare?
Survey What Fits Beneath Your Sink
Before you start organizing, take stock of what you’re working with beneath your sink. Measure the space’s width, depth, and height to understand your storage potential.
Check for plumbing obstacles like pipes and valves that might limit usable areas. Notice any built-in shelves or existing storage solutions already present.
You’ll want to assess what types of items typically accumulate there – cleaning supplies, sponges, paper towels, or perhaps pet food.
Consider how often you access these items daily or weekly. This helps determine what needs easy reach versus what can stay tucked away.
Pay attention to moisture levels and temperature fluctuations, since these affect what storage containers and materials work best.
Don’t forget to check if your space has adequate ventilation. Understanding these physical constraints helps you choose appropriate organizers that actually fit your unique setup.
Empty Everything Before Rearranging
You need to empty every item from your under-sink cabinet before you start reorganizing.
Take everything out and place it on a nearby counter or table where you can see it all.
Clean and dry the inside of the cabinet thoroughly before putting anything back.
Empty All Items First
Once you’ve gathered your supplies and prepared for the task ahead, it’s time to completely clear out your under sink cabinet.
Remove everything from the space, including cleaning products, sponges, and storage containers. Don’t forget items tucked away in corners or behind other objects. Place all items on a nearby counter or table where you can easily see everything.
This complete emptying allows you to assess what you own and identify items you no longer need. You’ll discover expired products, broken items, and duplicates you can donate or discard.
Working with an empty cabinet gives you the clean slate needed to organize efficiently. Take this opportunity to group similar items together before deciding what stays and what goes.
Clean And Dry Inside
30 minutes is all it takes to thoroughly clean your empty under sink cabinet.
You’ll transform this cramped space into a fresh, organized area that makes you feel like you belong in your perfectly maintained home.
- Wipe down all surfaces with warm, soapy water to remove grime and buildup.
- Scrub away stubborn stains or mold with baking soda paste.
- Rinse everything with clean water and dry completely with towels.
- Let the cabinet air dry for 10 minutes before placing items back.
Don’t skip this cleaning step – it’s your foundation for success.
You’re creating a space that reflects your care and attention to detail.
When everything’s spotless and dry, you’ll feel proud knowing your under sink area looks professionally organized.
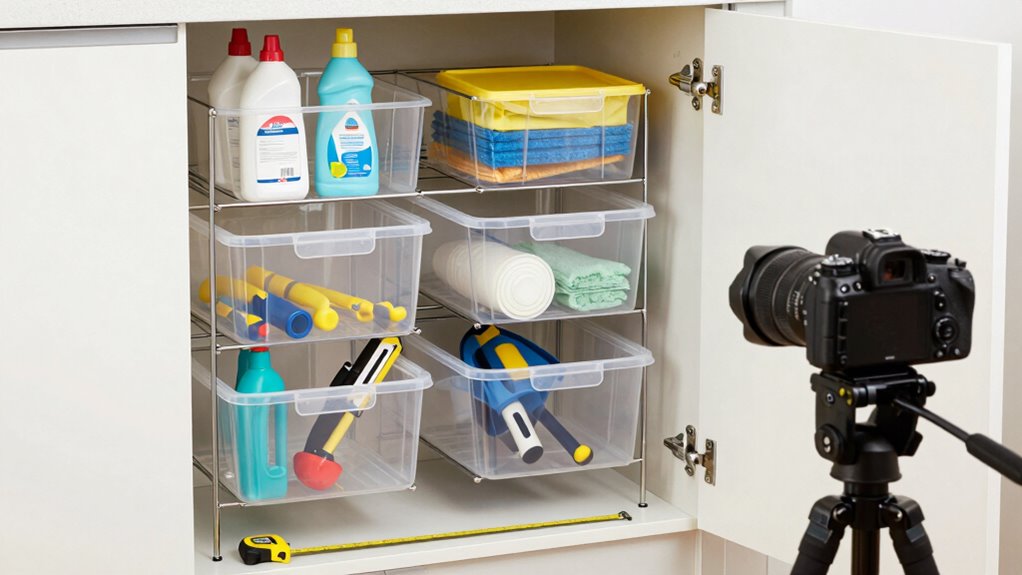
Install Height-Adjustable Shelving
Installing height-adjustable shelving transforms your under sink storage into a customizable solution that adapts to your specific needs.
You’ll maximize vertical space while accommodating items of various heights. Start by measuring your cabinet’s interior dimensions and selecting adjustable shelving that fits.
Remove existing shelves and install the new adjustable system according to manufacturer instructions. Position shelves higher or lower based on your storage requirements.
Place frequently used items at eye level and seasonal or rarely used products on higher or lower shelves. Adjust as your needs change throughout the year.
This flexible system grows with your household’s evolving storage demands. You’ll discover that customizable shelving creates an organized space that feels uniquely yours and works exactly how you need it to.
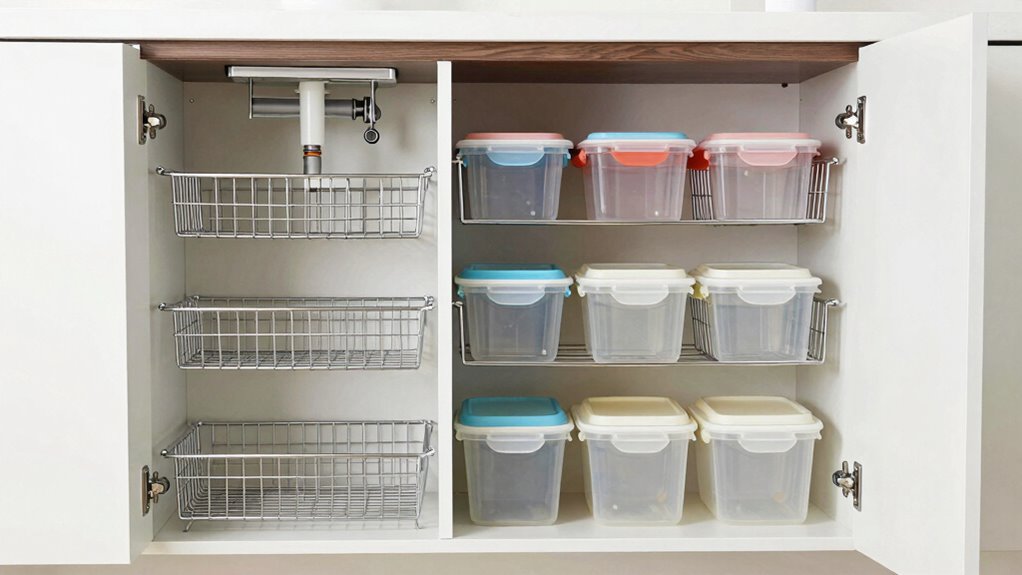
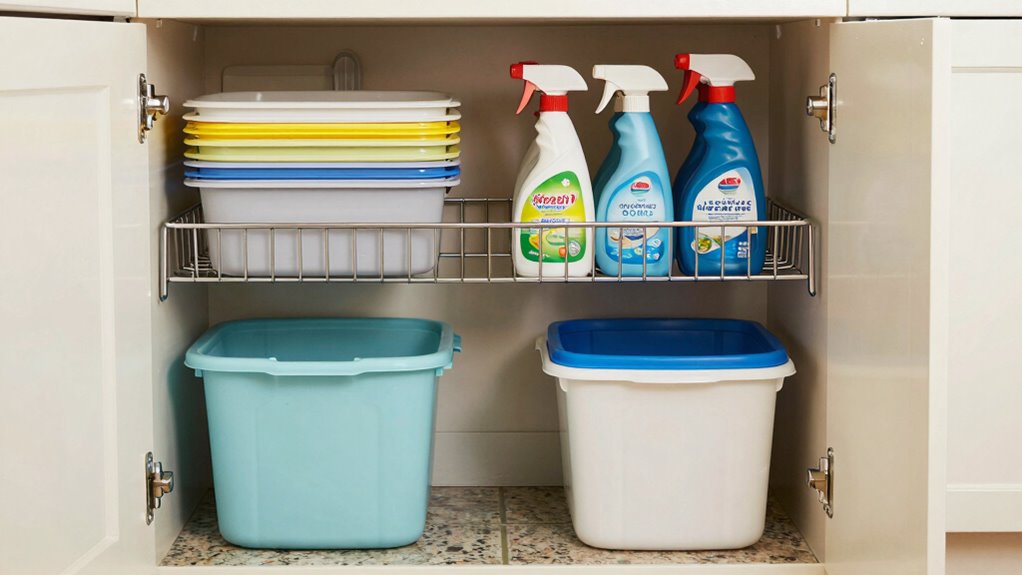
Use Stackable Storage Bins Below
Stackable storage bins let you maximize vertical space while keeping items sorted by how often you use them.
You should place frequently needed items in easily accessible bins and store seasonal or rarely used products in bins that are harder to reach.
Clear labeling on each bin helps you quickly find what you need without rummaging through multiple containers.
Maximize Vertical Space
Stackable storage bins transform wasted vertical space beneath your sink into organized, accessible storage.
You’ll maximize every inch while keeping items within easy reach.
- Choose clear plastic bins – You can quickly identify contents without opening each container, making retrieval faster and more efficient.
- Stack by category – Group similar items together vertically, placing frequently used products at eye level for convenient access.
- Label each bin – Create a simple identification system so everyone in your household knows exactly where things belong.
- Leave clearance space – Don’t overpack your vertical arrangement; maintain easy access to plumbing and guarantee bins slide out smoothly when needed.
Sort Items By Frequency
Now that you’ve maximized your vertical space with stackable bins, it’s time to organize your items by how often you use them.
Place daily essentials like dish soap, sponges, and cleaning spray in the top bins for easy access. Weekly items such as scrub brushes and bathroom cleaners go in middle sections. Monthly or seasonal products belong in bottom bins.
You’ll grab what you need quickly without disrupting your entire system. This method helps everyone in your household know exactly where things live.
When everything has its designated spot based on usage frequency, you’re creating a sense of order that connects you to your space. Your under-sink area transforms from chaotic storage into an organized extension of your daily routine.
Use Clear Labeling System
While you’ve already sorted items by frequency and added stackable bins, labeling each container clearly will help you maintain your organized system.
You’ll quickly identify contents without rummaging through stacked containers.
- Use waterproof labels or tape for cleaning product containers
- Write large, bold letters so text remains readable in dim lighting
- Color-code labels by category: green for cleaning supplies, blue for personal care
- Update labels immediately when you reorganize or replace items
Clear labeling creates belonging within your organized space.
Everyone in your household can easily find what they need while maintaining the system you’ve worked hard to create.
Don’t skip this simple step.
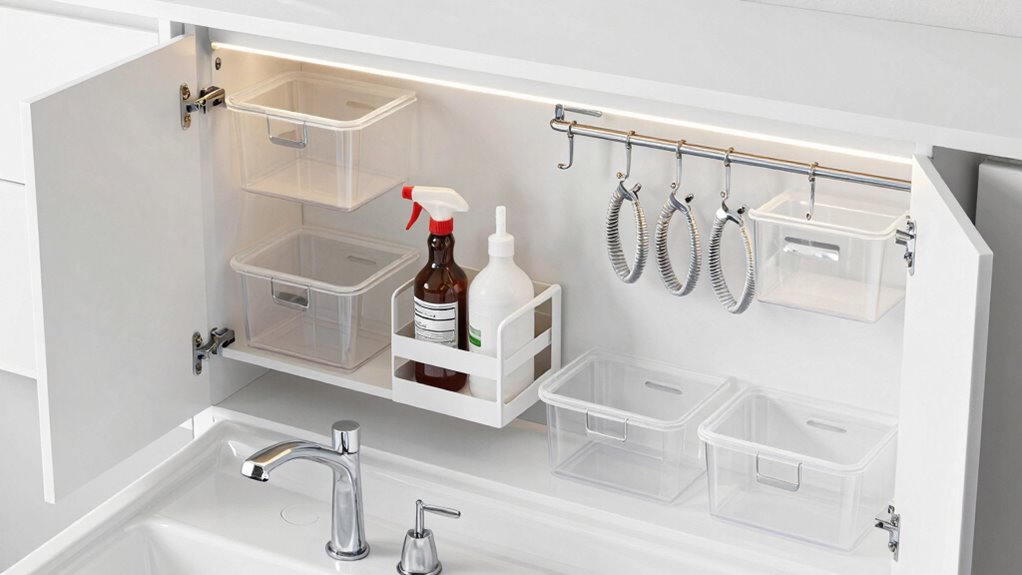
Hang Spray Bottles With Tension Rods
Multiple tension rods let you hang spray bottles upside down from your sink cabinet’s underside, keeping them easily accessible and freeing up valuable shelf space.
You’ll maximize storage while maintaining quick access to cleaning supplies. Install rods parallel to each other, spacing them according to your bottle sizes. Simply slide bottles between rods, letting them hang naturally.
This method works especially well for frequently used cleaners, so you don’t waste time searching through cluttered shelves. Adjust rod placement as needed when you add or remove bottles.
You’ll create an organized system that makes cleaning more efficient. Your under-sink area transforms from chaotic storage into a streamlined cleaning station that feels 有序 and manageable.
Arrange Often-Used Items Up Front
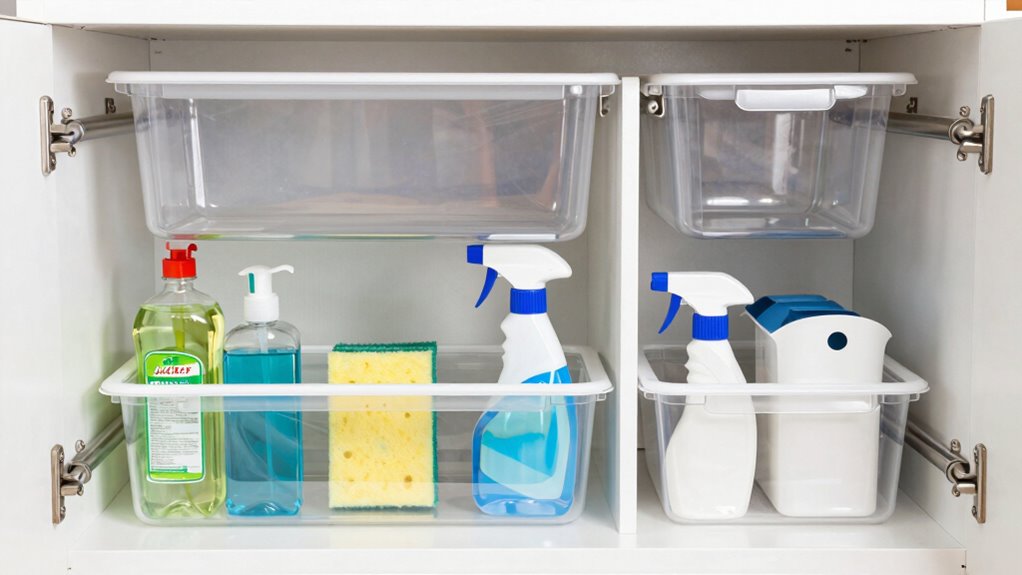
You should place your daily essentials like dish soap, sponges, and cleaning sprays within easy reach at the front of your under-sink cabinet.
Position frequently used items where you can grab them without moving other products around.
Organize everything by how often you use it, keeping the most needed items up front.
Prioritize Daily Essentials
Everyone benefits from keeping daily essentials within easy reach. When you organize your under-sink cabinet, place items you use every day where you can grab them quickly without bending or stretching.
- Keep your everyday dish soap and sponge in the front compartment or on top shelves.
- Store frequently used cleaning sprays within arm’s reach of the sink.
- Position paper towels and napkins where you can easily tear sheets without rummaging.
- Place your most-used hand towels and dish cloths in easily accessible drawers.
This simple system saves you time and reduces frustration during daily routines. You’ll find everything quickly, making cleanup and preparation more efficient.
Position Frequent Items
Building on the strategy of keeping daily essentials close at hand, arranging frequently-used items up front maximizes your efficiency.
You should place items you reach for multiple times weekly within easy arm’s reach. Store your favorite cleaning spray, trusted scrub brush, and go-to sponge right at the cabinet’s front. Keep those reliable items visible and accessible.
Position backup supplies and seasonal items toward the back. You’ll save time and reduce frustration when you need something quickly. This simple arrangement makes your daily routine smoother.
You’ll find yourself spending less time searching and more time getting things done. Your under-sink space becomes genuinely functional when you prioritize what matters most to your household’s everyday needs.
Organize By Usage
Since you use certain items daily, keeping them within easy reach transforms your under-sink cabinet into a functional workspace.
You’ll streamline your cleaning routine when everything has its designated spot.
- Place your all-purpose cleaner and sponge in the front left corner where you can grab them without bending down.
- Keep your dish soap and scrub brush at eye level on the middle shelf for easy access during meal prep.
- Store frequently used trash bags in a convenient basket near the cabinet door.
- Position your favorite cleaning cloths in a small bin on the top shelf so they’re visible and within arm’s reach.
This arrangement creates belonging through familiarity.
You’ll know exactly where everything belongs, making cleanup feel effortless rather than frustrating.
Your organized space reflects care and intention.
Place Bulky or Heavy Things Down Low
Six heavy items belong in the bottom shelf or floor of your under-sink cabinet.
Store your largest cleaning bottles, heavy buckets, and bulky containers down low where they’re easiest to reach. You’ll prevent back strain and cabinet damage by keeping weight distributed properly.
Place items you use less frequently in these lower areas too.
Position heavy-duty supplies like mop buckets, large detergent containers, and toolbox items on the bottom.
These locations support their weight better than upper shelves. You’ll create a stable, organized space that feels familiar and welcoming every time you open your cabinet doors.
Add Labels for Tools and Supplies
Now that you’ve arranged your heavy items at the bottom, it’s time to make everything easy to find. Labels transform your organized space into a system that works for you daily.
- Use clear, bold labels on all containers and shelves so everyone in your household knows where things belong.
- Create categories like “Cleaning Supplies,” “Tools,” and “Paper Products” to group similar items together.
- Place frequently used items at eye level and label them prominently for quick access.
- Add small labels to individual tools and supplies, like spray bottles and sponges, so they stay organized in drawers.
Labeling helps you maintain your system long-term. When everything has a designated spot, you’ll feel more confident and organized in your space.
Line the Floor to Prevent Leaks
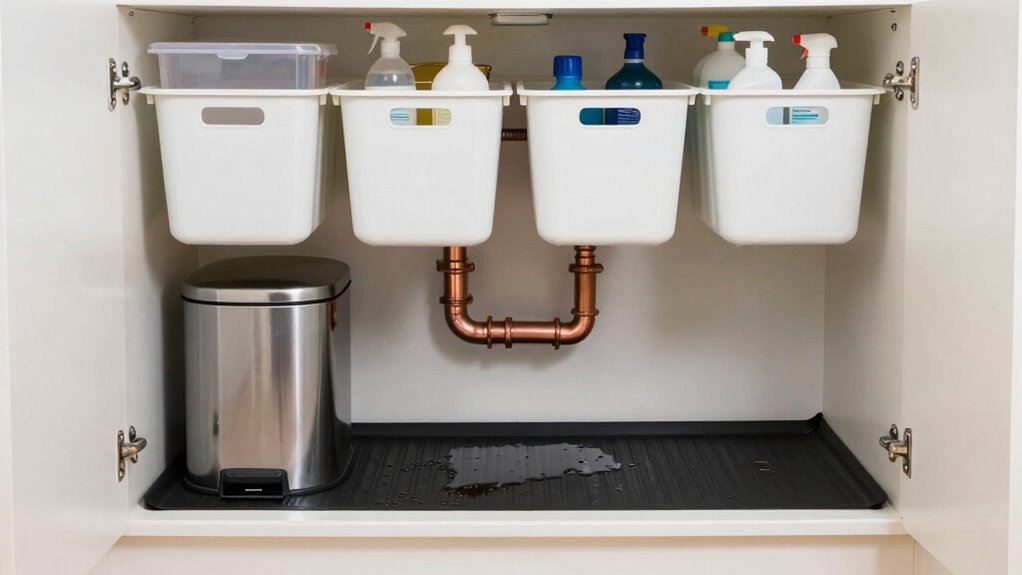
One essential step in protecting your under-sink cabinet is lining the floor with a waterproof material.
You should use a plastic drop cloth, vinyl liner, or specialized under-sink mat that catches water and prevents damage to your cabinet base. Cut the liner to fit perfectly, extending slightly up the sides of the cabinet for complete coverage.
Choose materials that are easy to clean and replace when needed. Avoid using newspaper or cardboard, which disintegrate when wet.
You can find adhesive-backed liners that stay in place, or simply lay down a removable sheet that you can swap out periodically.
This simple protection prevents costly water damage and keeps your storage space clean. You’ll feel more confident storing items underneath knowing leaks won’t ruin your cabinet or create mold issues.
Make this protective layer part of your under-sink organization system today.
Revisit and Optimize Twice a Year
While you’ve organized your under-sink cabinet perfectly, maintaining that system requires regular attention.
Don’t let your hard work go to waste by forgetting about it. Set reminders to reassess twice yearly.
- Check expiration dates on all cleaning products and dispose of anything outdated
- Rearrange items based on seasonal cleaning needs and frequency of use
- Clean the cabinet interior thoroughly, wiping down shelves and removing any buildup
- Reevaluate your storage system and adjust organizational tools if your habits have changed
This simple maintenance keeps your space functional and prevents clutter from creeping back in.
You’ll feel accomplished knowing everything stays fresh and accessible.
Conclusion
Keep your under-sink space tidy by regularly reassessing what you store there. Like a well-oiled machine, your organized cabinet will run smoothly when you maintain it twice yearly. Focus on accessibility and proper storage solutions to maximize every inch. Your future self will thank you for this efficient setup.
")