Sarah spent Sunday meal prepping but struggled all week finding ingredients because her fridge lacked organization. You can avoid this frustration by creating designated zones for proteins, vegetables, and grains before you even start cooking. Clear containers and strategic placement make assembly faster and reduce food waste. Want to know the specific temperature zones that keep your ingredients fresh longer?
How to Prep Your Fridge for Effortless Weekly Meals
A well-organized fridge is your secret weapon for successful meal prep. You maximize efficiency when you prepare your fridge properly before diving into weekly cooking routines.
Start by cleaning everything out completely, checking expiration dates, and wiping down shelves. Group similar items together – proteins, vegetables, grains, and ready-to-eat foods each need designated spaces.
Invest in clear containers that stack well and label them with contents and dates. This prevents food waste and saves you time hunting for ingredients. Position frequently used items at eye level where you can easily see them.
Keep your meal prep containers uniform and organized by size. When you prep your fridge systematically, you create a foundation that supports consistent, stress-free cooking habits every single week.
Start Meal Prep by Mapping Your Fridge Zones
You should map your fridge into distinct zones based on temperature control and usage frequency to maximize food safety and accessibility.
Start by designating specific storage areas for different food categories like proteins, vegetables, and prepared meals.
This strategic organization prevents cross-contamination while making meal prep assembly faster and more efficient.
Zone Mapping Basics
Zone mapping transforms your fridge into an efficient meal prep command center by assigning specific areas for different food categories.
You’ll designate zones based on temperature consistency and accessibility. The door shelves work well for condiments and beverages you grab frequently. Upper shelves suit ready-to-eat meals and leftovers you consume within days. Middle sections accommodate dairy products requiring stable temperatures. Lower drawers excel at storing raw proteins and vegetables needing humidity control.
This systematic approach reduces food waste while streamlining your prep routine.
You’ll spend less time searching and more time cooking. Strategic zone placement guarantees items maintain peak freshness longer. Temperature fluctuations vary throughout your fridge, so matching foods to appropriate zones maximizes shelf life.
Your organized system creates belonging through consistent habits.
Storage Area Designation
Once you’ve understood how temperature variations affect food storage, mapping your fridge zones becomes essential for successful meal prep. You’ll want to designate specific areas based on temperature consistency and accessibility.
The bottom shelf stays coldest, perfect for raw meats and dairy. Upper shelves maintain moderate temperatures, ideal for prepared meals and leftovers. Door shelves experience the most temperature fluctuation, so store condiments and preserved items there. Crisper drawers provide humidity control for fruits and vegetables.
You should assign each zone a specific purpose: keep proteins separate from produce, store ready-to-eat items at eye level, and place frequently accessed ingredients within easy reach. This systematic approach prevents cross-contamination while streamlining your meal prep workflow.
Set Up Temperature Zones for Food Safety

Proper temperature zone management prevents foodborne illness and maintains freshness throughout your meal prep routine. You need to understand your refrigerator’s natural temperature variations to store food safely.
- Keep your refrigerator between 34-38°F – Use a thermometer to monitor temperatures regularly, as this range inhibits bacterial growth effectively.
- Organize items by temperature sensitivity – Store highly perishable items like dairy and meat in the coldest areas, typically the back and bottom shelves where temperatures remain most stable.
- Avoid overpacking your fridge – Maintain proper air circulation to guarantee consistent temperatures throughout all zones, preventing warm spots that encourage bacterial multiplication.
Smart temperature zone setup protects your family’s health while extending food lifespan. You’re creating a safer kitchen environment for everyone.
Store Raw Proteins Safely at the Bottom
Since raw proteins like meat, poultry, and fish pose the highest risk of cross-contamination, you should always store them on the bottom shelf of your refrigerator. This prevents juices from dripping onto other foods below.
Keep raw proteins in their original packaging or transfer them to leak-proof containers. Place them where temperatures stay consistently cold, usually the bottom back corner. You’ll want to maintain proper food safety while making meal prep efficient.
Store different protein types separately to avoid mixing flavors and bacteria. Position poultry on the very bottom since it carries higher salmonella risks. Fish should go above poultry but still on lower shelves. Red meat can sit slightly higher than poultry.
Remember that raw proteins need temperatures at or below forty degrees Fahrenheit to stay safe. Check your fridge thermometer regularly.
Keep Dairy and Eggs in Stable Cold Areas
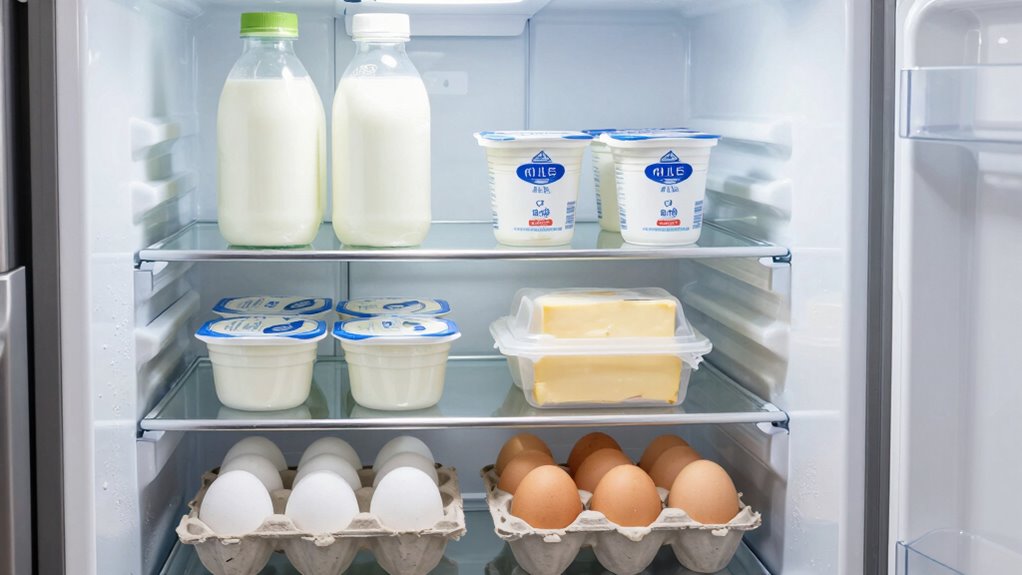
While raw proteins demand the coldest spots in your fridge, dairy products and eggs need stable cold temperatures to maintain freshness and prevent spoilage.
Temperature fluctuations damage these perishable items quickly.
You should store these items strategically:
- Keep dairy products on middle shelves where temperatures remain consistent, not in fridge doors where they experience constant temperature changes.
- Store eggs in their original carton on a shelf rather than in the door egg holder to minimize temperature swings and maintain quality.
- Maintain your fridge at 37°F for ideal dairy and egg preservation.
These simple adjustments prevent waste and keep your meal prep ingredients fresh longer.
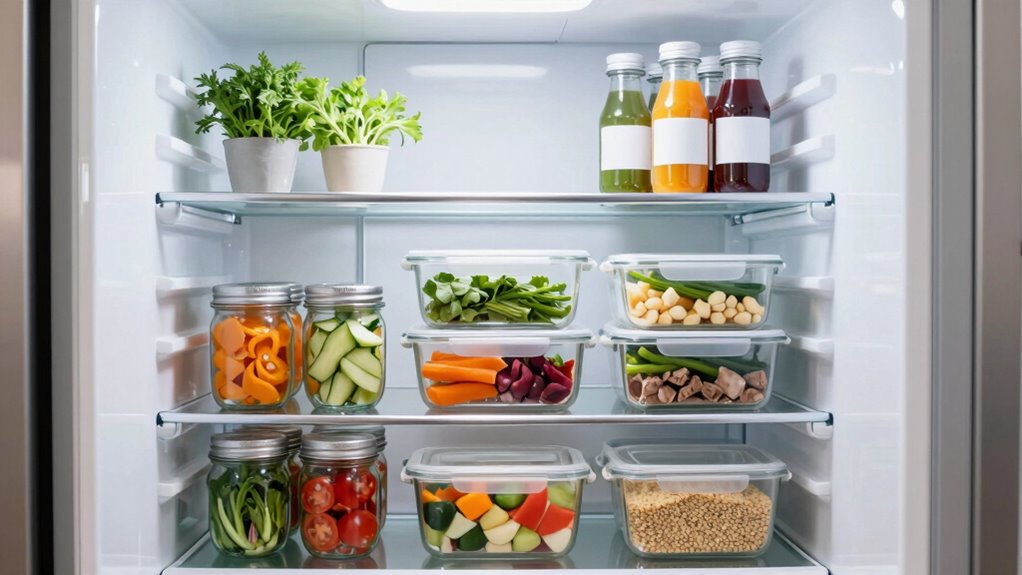
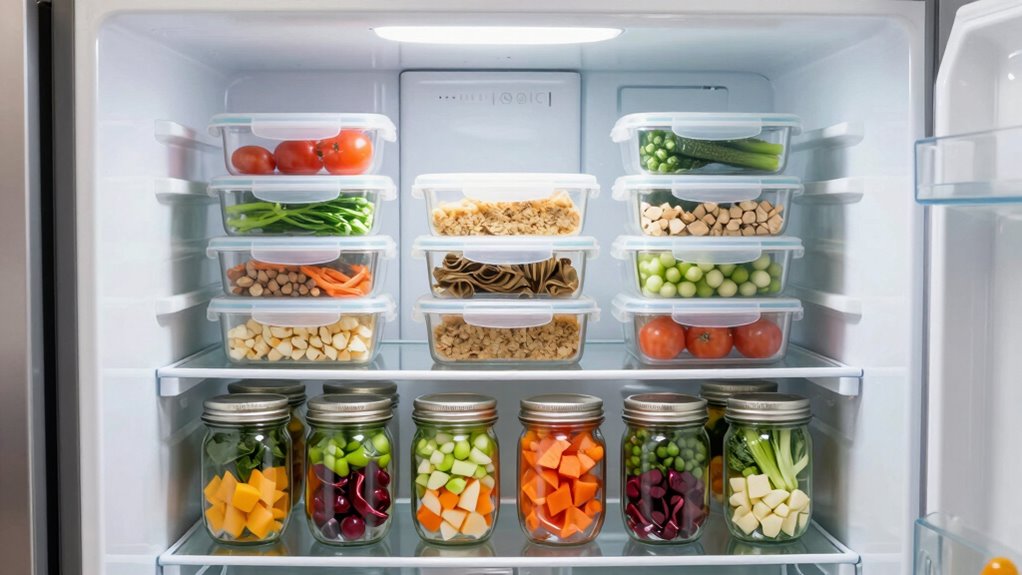
Organize Produce by Shelf Life and Ripeness
Because produce items have varying shelf lives and ripening requirements, organizing them effectively prevents waste and maintains ideal freshness for your meal prep ingredients.
You should place items needing immediate use in easily accessible spots. Store ethylene-producing fruits like bananas and avocados separately from ethylene-sensitive vegetables to prevent premature spoilage.
Keep leafy greens in crisper drawers with high humidity settings, while root vegetables thrive in cooler, drier conditions. Arrange produce by harvest date, using older items first.
Place ripening fruits at room temperature until ready, then move to refrigerator. Group similar items together—herbs, berries, citrus—making meal prep efficient.
This systematic approach guarantees you’ll always grab the freshest ingredients, reducing food waste while maximizing your prep efficiency.
Prep and Store Bulk Cooked Grains First
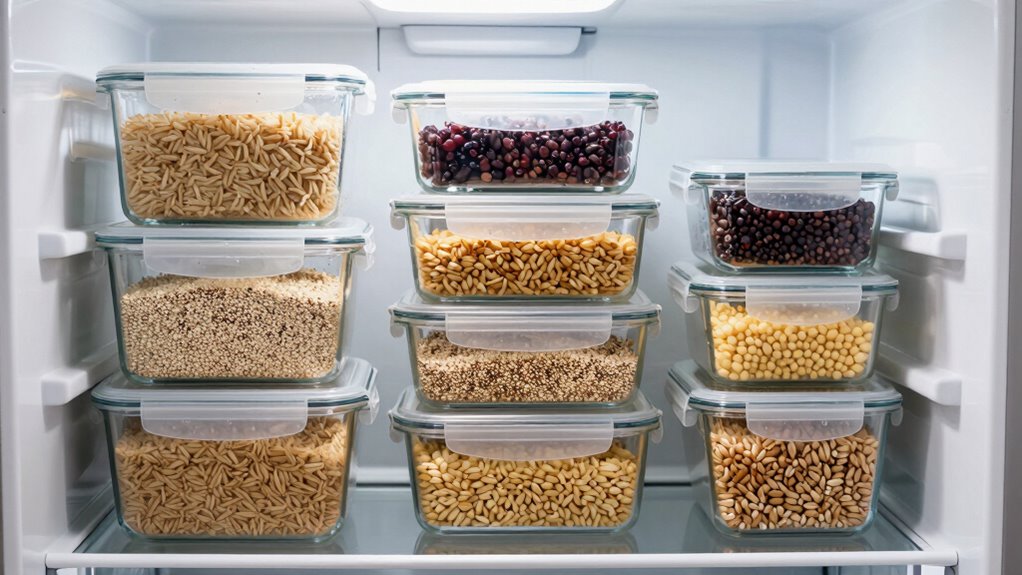
You should cook grains like rice, quinoa, and pasta in large batches once weekly to maximize efficiency.
Store these cooked grains in airtight containers that are appropriately sized for your meal portions.
Always label each container with the grain type and preparation date to maintain food safety and easy identification.
Cooking Grains in Bulk
Preparing grains in bulk saves significant time and guarantees you always have healthy meal components ready.
You’ll streamline your weekly meal prep while assuring nutritious options are always available.
- Choose versatile grains – Brown rice, quinoa, and farro provide different textures and nutrients for various meals throughout the week.
- Cook with batch integrity – Use consistent water-to-grain ratios and cooking times to assure uniform results that store and reheat predictably.
- Cool properly before storing – Let grains reach room temperature within two hours to prevent bacterial growth and maintain quality texture.
These steps create reliable meal prep foundations that fit seamlessly into your organized fridge system.
Proper Storage Containers
Investing in the right storage containers transforms your bulk-cooked grains from ordinary ingredients into organized meal prep assets. You should choose airtight containers that stack efficiently in your fridge.
Glass containers with tight-fitting lids work best because they’re microwave-safe and won’t absorb odors. Plastic containers are lighter but may stain over time.
Portion your grains into serving-sized containers immediately after cooking while they’re still warm. This prevents clumping and makes reheating easier. Clear containers let you quickly identify contents without opening them.
You’ll save time and reduce food waste when everything has its place. The right containers create systematized storage that simplifies your weekly meal prep routine.
Your future self will thank you for this small investment that pays dividends in convenience and organization.
Labeling and Dating Tips
Proper storage containers create the foundation for organized meal prep, but labeling and dating your bulk-cooked grains guarantees you maintain food safety and maximize freshness.
You’ll want to implement these essential practices:
- Use permanent markers – Write clearly on containers with waterproof markers that won’t smudge or fade, ensuring visibility even when condensation forms.
- Apply first-in, first-out rotation – Place newer grains behind older ones and always check dates before cooking to prevent foodborne illness from spoiled grains.
- Include reheating instructions – Add brief cooking directions on labels so anyone in your household can safely prepare meals without guesswork.
These simple steps create consistency and build trust within your meal prep routine.
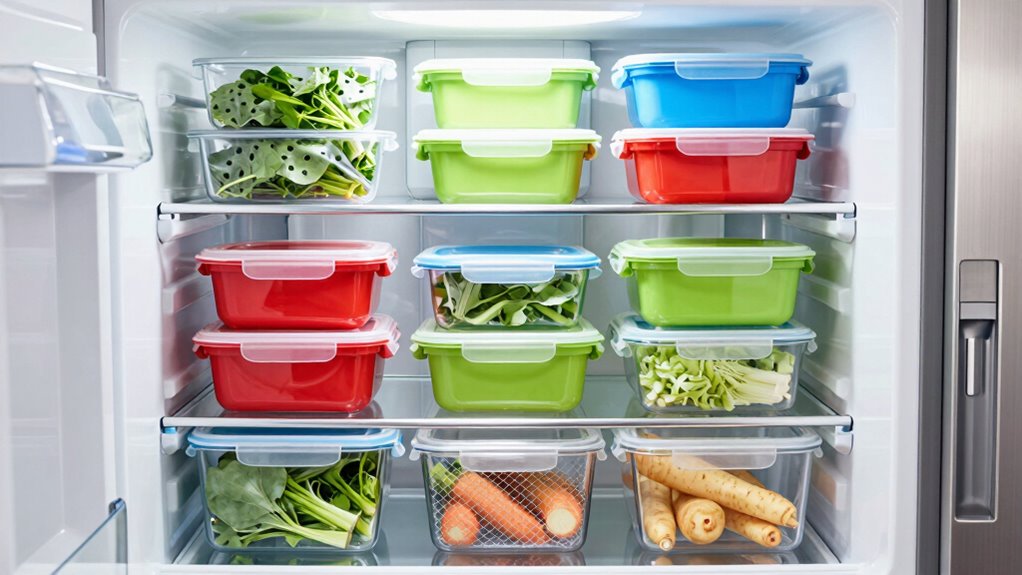
Use Clear Containers for Leftovers and Meal Kits
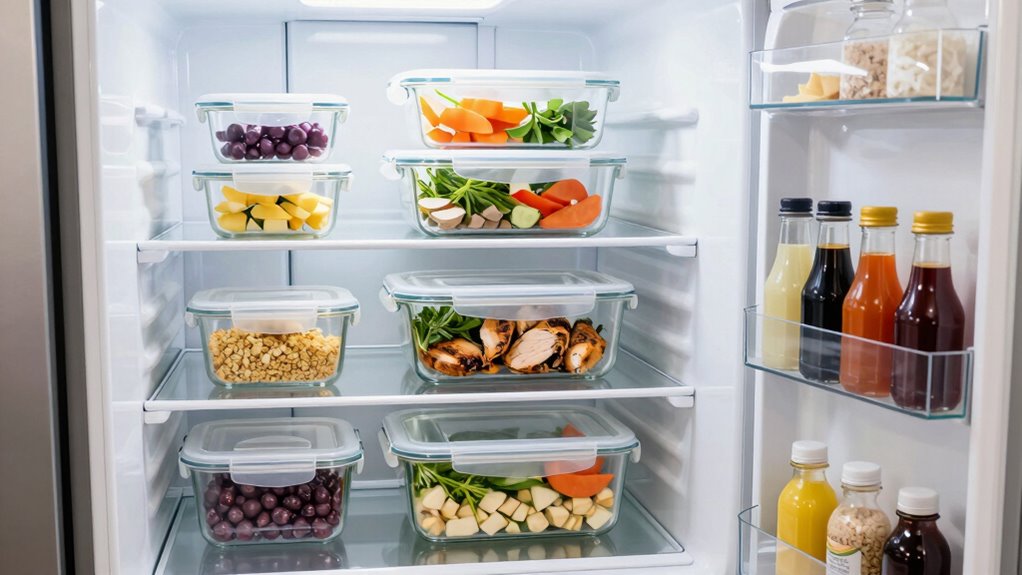
Clear containers transform your fridge organization by making contents instantly visible. You can quickly identify what’s inside without opening multiple containers, saving time during busy meal prep sessions.
Transparent storage solutions help you avoid forgotten leftovers that expire unnoticed in the back of your fridge.
When you use clear containers for meal kits, you create visual consistency that makes your fridge look organized and professional. This approach helps you stick to your meal prep routine because everything appears accessible and manageable.
Choose containers with uniform shapes that stack easily. Square or rectangular options maximize storage space while maintaining visibility.
You’ll feel more confident about your meal prep system when you can see exactly what you have available.
Label Everything With Dates and Contents
One simple step can dramatically reduce food waste and confusion: labeling your containers with dates and contents. You’ll immediately know what’s inside each container and when you prepared it, preventing unnecessary guessing games.
- Use permanent markers or waterproof labels – Write clearly on containers or label makers to guarantee information stays readable even after condensation or cleaning.
- Include preparation dates and contents – Write both the date and what’s inside, like “2/15/24 – Chicken Breast” instead of just “chicken.”
- Update labels when contents change – Don’t leave old labels on containers when you add new ingredients; crossed-out dates prevent confusion about freshness.
Labeling creates systematized organization that works for everyone in your household.
You’ll reduce food waste, save money, and eliminate that rotten-smelling mystery container syndrome that plagues so many fridges.
Stack Smartly to Fit More in Less Space
Smart stacking maximizes your fridge’s vertical space while keeping meals accessible and organized. You should stack heavier items on bottom shelves and lighter ones above.
Group similar containers together and use uniform-sized boxes to create stable towers. Place frequently used items at eye level where you can easily see them. Stack prepared meals in matching containers to save space and maintain organization.
Use shelf risers or clear bins to create additional storage layers without cluttering your fridge. Keep taller items toward the back where they won’t block access to other foods.
Stack items by meal type or prep date to streamline your weekly routine. This method helps you fit more food efficiently while maintaining easy access to everything you need.
Create Grab-and-Go Zones for Snacks and Sides
You should designate your top shelf area for grab-and-go snacks and sides since it’s the most visible and accessible spot in your fridge.
Clear storage containers let you quickly identify contents without opening multiple boxes, saving time during busy mornings.
Label everything clearly so you can locate specific items instantly and maintain organization without guesswork.
Designate Top Shelf Area
The top shelf of your fridge deserves special attention when meal prepping. You’ll want to maximize this prime real estate for items you access most frequently.
- Place ready-to-eat snacks like yogurt, cut vegetables, and hummus within easy reach. These items get consumed quickly when they’re visible and accessible.
- Store pre-portioned sides such as fruit cups, cheese sticks, and prepared salads. Keeping these organized helps you make healthier choices when hunger strikes.
- Keep condiments and dressings handy for quick meal assembly. Having these essentials visible eliminates time spent searching through lower shelves.
Position frequently used items at eye level where you naturally look first. This strategic placement reduces decision fatigue and supports your meal prep goals effectively.
Use Clear Storage Containers
When you use clear storage containers for your meal prep snacks and sides, you’ll instantly know what’s inside without having to open each container. This transparency saves you time and reduces decision fatigue during busy weeks.
Clear containers eliminate the guesswork that leads to forgotten food and wasted meals. You’ll feel more organized and in control of your eating habits. Place these containers in designated grab-and-go zones, creating an efficient system that works for your lifestyle.
Research shows that visible food storage increases healthy eating choices by twenty-three percent. Your future self will appreciate knowing exactly where to find pre-portioned snacks and prepared sides.
This simple switch to clear containers transforms your fridge into a streamlined meal prep command center that supports your goals.
Label Everything Clearly
Labeling your containers creates grab-and-go zones that boost meal prep efficiency by up to forty percent.
You’ll save time and reduce decision fatigue when everything has a clear identity.
Create dedicated zones for quick access:
- Snack station – Label nuts, fruits, and protein bars in easy-to-reach areas
- Prep container section – Mark containers with contents and dates for seamless selection
- Side dish area – Designate spots for labeled portions of vegetables, grains, and sauces
You belong in the organized kitchen club where every item serves your goals.
Clear labels eliminate guesswork and prevent food waste.
Your future self will thank you when grabbing yesterday’s prepped chicken or today’s apple slices becomes instantaneous.
Stop wasting mental energy deciphering unlabeled containers.
Prevent Cross-Contamination Between Zones
One key strategy for maintaining food safety during meal prep involves separating raw and cooked foods across different fridge zones. You should designate specific shelves for raw meats, keeping them on the bottom shelf to prevent juices from dripping onto other foods.
Place cooked meals and ready-to-eat items on higher shelves. Use separate containers for raw and cooked foods, and never store them together. Keep raw poultry isolated from other raw meats. Store vegetables away from raw animal products.
You’ll reduce foodborne illness risks greatly by creating these distinct zones. This separation protects your family’s health while ensuring meal prep remains efficient.
Remember that cross-contamination happens quickly, so maintaining these boundaries protects everyone who eats your prepared meals.
Maximize Door Space Without Risking Spoilage

While organizing your fridge door for meal prep, prioritize items that won’t spoil quickly since door shelves experience temperature fluctuations.
You’ll want to maximize this prime real estate without compromising food safety.
- Store condiments and sauces – These items contain preservatives and acidity that prevent spoilage, making them perfect for door storage where temperature varies.
- Keep beverages and water – Sealed drinks won’t spoil from minor temperature changes, and you’ll access them easily when grabbing meals.
- Organize jarred items – Pickles, jams, and preserves maintain quality on door shelves because their sealed containers protect contents from fluctuating temperatures.
Use Drawer Dividers for Small Items and Herbs
You can maximize your fridge’s drawer space by using dividers to separate small items like condiment packets, yogurt cups, and snack containers. These dividers prevent tiny items from getting lost or mixed together, making it easier to find what you need during meal prep.
You should also use dividers to store fresh herbs properly, keeping them visible and accessible while maintaining prime freshness for your cooking needs.
Organize Small Items Efficiently
Because small items tend to get lost in refrigerator drawers, using dividers creates designated spaces that keep everything visible and accessible.
You’ll streamline your meal prep process while reducing food waste from forgotten ingredients.
- Categorize similar items together – Group condiments, spices, and small containers in separate sections to eliminate searching time during busy cooking sessions.
- Label each divider section – Use removable labels to identify contents quickly, making it easier for household members to maintain organization long-term.
- Adjust divider sizes based on usage frequency – Allocate larger spaces for items you use daily and smaller sections for occasional ingredients, maximizing drawer efficiency.
This systematic approach helps you feel more confident and prepared in your kitchen routine.
Store Fresh Herbs Properly
Fresh herbs wilt quickly when stored improperly, so organizing them effectively in your refrigerator extends their lifespan and maintains flavor intensity. You should treat herbs like flowers by trimming stems and placing them in water containers.
Store tender herbs like cilantro and parsley upright in jars, changing water every two days. Hardier herbs like rosemary and thyme last longer when wrapped in damp paper towels inside sealed containers.
Drawer dividers help separate different herb types, preventing cross-contamination and maintaining ideal humidity levels. Label each section clearly so family members know where items belong.
This systematic approach reduces waste while ensuring you always have fresh herbs ready for meal prep, making your cooking experience more efficient and enjoyable.
Put Condiments Where You’ll Use Them
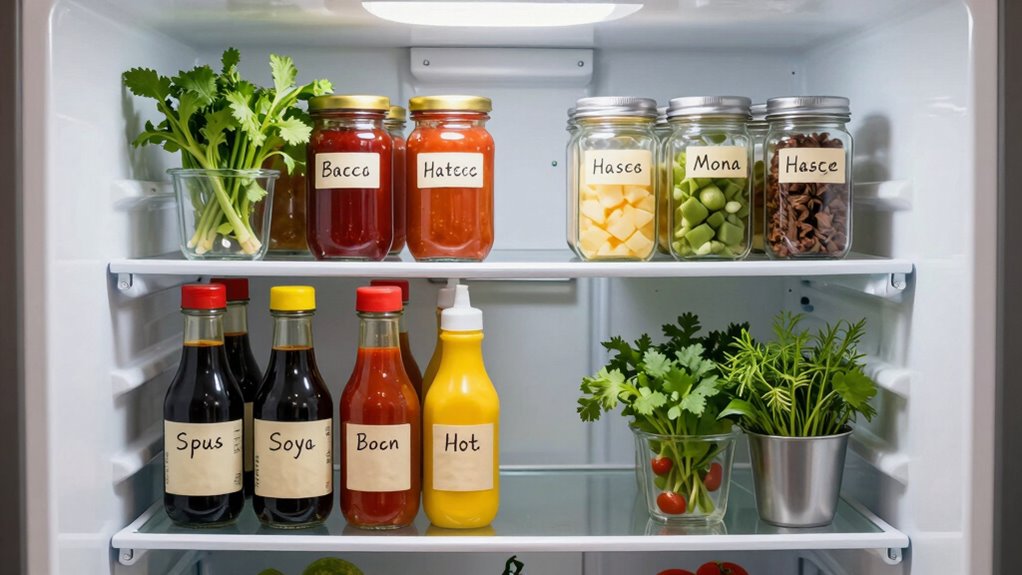
When you store condiments near the foods you’ll pair them with, grabbing what you need becomes effortless. This simple strategy eliminates scrambling through your fridge during meal prep.
- Place dressings and oils near your salad ingredients – keeping balsamic vinegar next to your greens saves time when assembling meals.
- Store cooking sauces beside your protein section – positioning soy sauce and marinades near chicken or tofu reduces prep time considerably.
- Keep spreads and toppings close to bread and wrap stations – arranging mustard, mayo, and hummus near your sandwich supplies streamlines breakfast and lunch preparation.
This organization method works because it mirrors how your brain processes cooking tasks.
You’ll find yourself naturally reaching for the right condiments without disrupting your meal prep flow.
Rotate Items Using First-In, First-Out Logic
Storing condiments near their corresponding foods streamlines your meal prep process, but maintaining that efficiency requires regular attention to item rotation. You should always place newer items behind older ones, ensuring you use the oldest products first. This first-in, first-out approach prevents food waste and maintains freshness throughout your fridge.
Check expiration dates weekly and rearrange accordingly. Move items with earliest dates to the front where you’ll see them. When you add new groceries, push existing items back rather than stacking new ones on top. This simple habit keeps your meal prep ingredients fresh and reduces the chance of forgotten items spoiling.
Organize similar items together while maintaining this rotation system. Your consistent attention to item placement creates a streamlined workflow that supports successful meal preparation every week.
Refresh Weekly Layout as You Prep New Items

Reassess your fridge’s organization every week to maintain ideal meal prep efficiency. Your storage needs change as you prepare new meals, so staying flexible keeps everything working better for you.
- Move frequently used items to eye-level shelves where you can grab them quickly without searching through multiple compartments.
- Adjust shelf positions to accommodate taller containers or large meal prep batches that won’t fit in standard spaces.
- Reorganize zones based on your current meal plan – keep breakfast items together, lunch components accessible, and dinner ingredients grouped logically.
Weekly refreshes prevent frustration and maintain your meal prep momentum.
When your fridge works with your routine instead of against it, you’re more likely to stick with healthy eating habits.
This simple practice helps you feel more connected to your food and your goals.
Fix These 5 Fridge Mistakes That Spoil Meal Prep
You might be sabotaging your meal prep efforts without realizing your fridge’s temperature zones are improperly set.
Storing items in the wrong areas creates poor air circulation patterns that accelerate spoilage and waste your hard work. These common mistakes directly impact your food’s freshness and safety, making it essential to understand proper fridge organization.
Improper Temperature Zones
While many people don’t realize it, your fridge’s temperature zones can make or break your meal prep efforts.
You’re not getting the full benefit of meal prep if your fridge temperatures aren’t optimized.
Your fridge should maintain 32-40°F in the main compartment and 0°F in the freezer.
Here’s what you need to fix:
- Check your temperature settings regularly – Most fridges have adjustable zones that need monitoring.
- Store items in proper locations – Keep dairy and meats in the coldest areas, not door shelves.
- Use a thermometer – Don’t rely on your fridge’s digital display; verify actual temperatures.
When temperatures aren’t consistent, your prepared meals spoil faster than expected.
You deserve meal prep success, so make certain your fridge maintains proper temperature zones.
Poor Air Circulation Patterns
Poor air circulation in your fridge can silently sabotage your meal prep efforts.
When you overcrowd shelves or block vents, you create dead zones where temperatures fluctuate dangerously. Your prepared meals spoil faster because cold air can’t circulate properly around containers.
You should avoid stacking containers too tightly together. Leave space between items so air flows freely.
Don’t place large items directly in front of cooling vents. Keep frequently accessed items towards the front, not blocking rear airflow.
Position your meal prep containers strategically. Store them where air circulates well, typically middle shelves away from direct vent paths.
Use smaller containers that fit properly rather than cramming oversized ones. Maintain clear pathways for air movement throughout your fridge.
These simple adjustments prevent bacterial growth and keep your prepared meals fresh longer.
Conclusion
Think of your fridge as a conductor’s podium—every item needs its precise place to create harmony. When you organize strategically, meal prep transforms from chaos to symphony. A study found that families who mapped their fridge zones saved 43% more food from spoiling. Stop letting produce wilt in wrong temperatures or proteins contaminate ready meals. Take control now—your future self will thank you for the 15 minutes invested today.
")