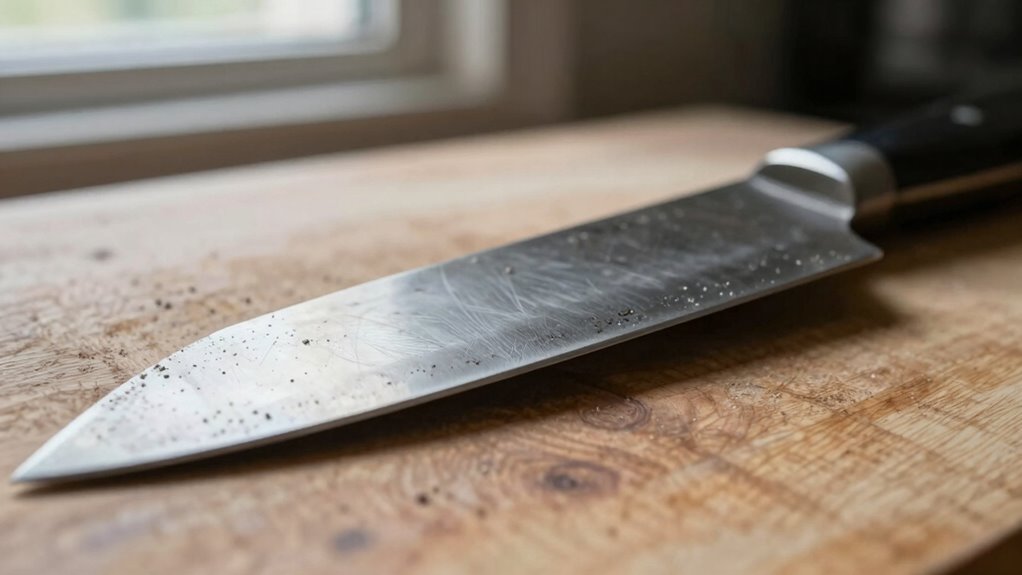
You probably don’t need expensive sharpening tools to maintain sharp kitchen knives. Your everyday items can do the job effectively. A ceramic coffee mug, leather belt, or even concrete can become makeshift sharpening surfaces. You’ll want to understand the proper techniques and angles to avoid damaging your blades while restoring their cutting edge. Let’s explore which common household items actually work and how to use them correctly.
How Often Should You Sharpen Knives
How frequently should you actually sharpen your kitchen knives? You should hone them every 2-3 uses with a steel, but true sharpening depends on your cutting frequency and technique.
Daily cooks need professional sharpening every 1-2 years, while occasional users extend this to 3-4 years. Your cutting board material matters—wood and plastic are gentler than glass or stone.
Proper storage prevents unnecessary dulling between sessions. You’ll develop intuition through regular honing; your knife’s cutting performance tells you when it needs attention.
Don’t wait until cutting becomes difficult. Regular maintenance keeps your edge consistent and prevents dangerous slipping.
Professional sharpening removes minimal metal while restoring ideal geometry. You belong in the kitchen when your tools perform reliably.
Signs Your Knife Is Dull
Recognizing when your knife has lost its edge saves time and prevents accidents in the kitchen.
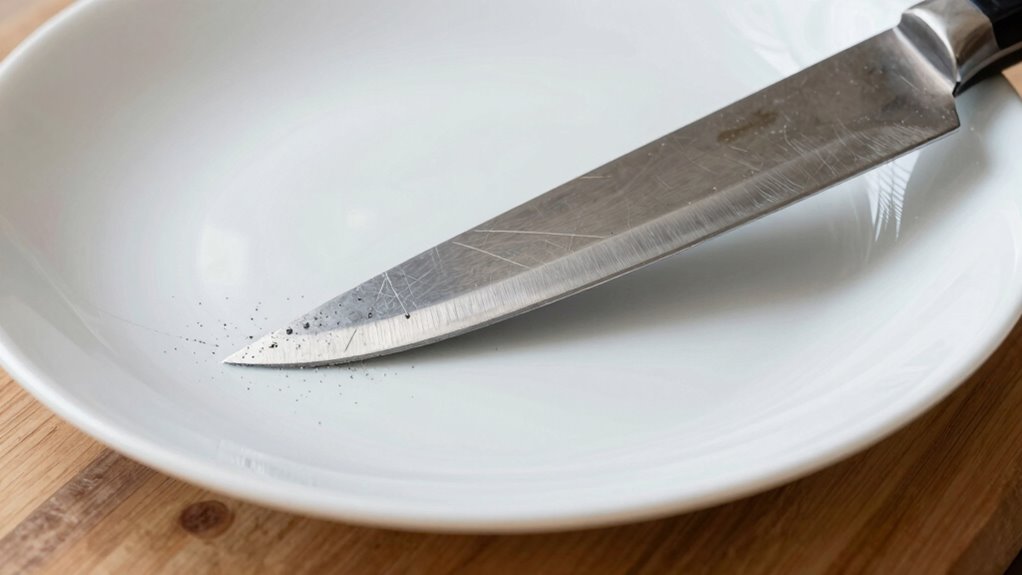
You’ll notice it requires more pressure to cut through foods that once sliced effortlessly. Vegetables won’t cleave cleanly; instead, they tear or crush under blade pressure. Meat fibers resist cutting, forcing you to saw back and forth rather than slice smoothly.
Your knife may slide across surfaces instead of biting into them. Pay attention to how food reacts when contact is made – dull blades push ingredients around rather than cutting through with minimal effort.
These signs indicate your blade’s edge has degraded and needs restoration. Don’t ignore these warning signals; addressing dullness promptly maintains kitchen efficiency. Your cooking performance depends on sharp tools, so monitor these indicators carefully during meal preparation.
Essential Tools Already in Your Kitchen
You probably already own several household items that can effectively sharpen your kitchen knives without purchasing specialized equipment.
Common kitchen drawer essentials like ceramic mugs, leather straps, and even nail files can restore your blade’s edge when used correctly.
These alternative sharpening methods require proper technique but eliminate the need for expensive tools while delivering professional results.
Common Household Items
Most kitchens already contain several items that can effectively sharpen dull blades.
Your ceramic coffee mug’s unglazed bottom works as an improvised sharpening stone. Turn the mug upside down and use its rough base to hone edges with consistent pressure.
Cast iron pans, when seasoned properly, provide excellent abrasive surfaces for dull knives. The pan’s bottom offers consistent grit that removes burrs effectively.
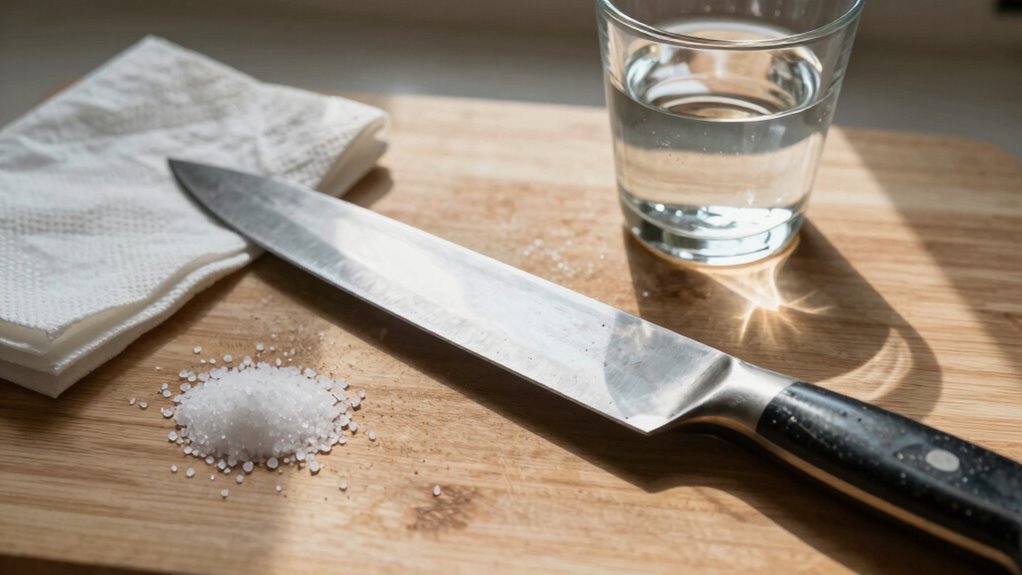
Salt acts as an abrasive compound when mixed with oil or water. Combine coarse salt with lemon juice for a paste that cuts through dullness.
Steel wool pads, specifically fine-grade varieties, help remove rust and minor dullness. You’ll achieve remarkable results using these everyday items.
Each tool requires proper technique and consistent motion patterns. Master these methods and you’ll join the ranks of experienced home cooks who maintain razor-sharp blades effortlessly.
Alternative Sharpening Methods
While your kitchen may lack specialized sharpening tools, several essential items can restore blade sharpness through proper technique.
You’ll need to maintain a consistent 20-degree angle while drawing your knife across surfaces. Un-glazed ceramic plates work effectively when you sweep the blade perpendicular to the rough surface. Grip firmly but don’t press excessively.
Steel rolling pins require similar angular control, sliding the edge along the cool metal. Sandpaper folded into quarters provides abrasive cutting action when you maintain steady pressure throughout strokes.
Coffee mugs with unglazed bases offer surprisingly effective sharpening surfaces too. Concentrate on alternating sides evenly.
Each method demands patience and repetitive motion. Test sharpness frequently by slicing through paper.
These techniques won’t create factory edges but they’ll restore functional cutting ability using items already cluttering your drawers and cupboards.
Kitchen Drawer Essentials
Ceramic plates, steel rolling pins, sandpaper, and coffee mugs transform into effective sharpening tools when you’re missing specialized equipment.
Your ceramic dinner plate’s unglazed bottom provides excellent abrasive surface for honing edges at 20-degree angles. Steel rolling pins offer consistent pressure distribution during blade refinement. Fine-grit sandpaper, around 1000-grit, removes burrs and polishes edges when rubbed against the blade bevel.
Turn your coffee mug upside down, using the unglazed bottom portion as an abrasive surface. Maintain proper cutting angles by matching your knife’s existing bevel. Apply light, consistent pressure while drawing the blade across these surfaces.
You’re already equipped with everything needed for basic sharpening tasks. These common household items deliver professional results when used correctly.
Use a Honing Rod Weekly
You should maintain your knife’s edge weekly using a honing rod to prevent dulling from regular use.
Hold the rod vertically and stroke each side of the blade at a 15-20 degree angle, applying consistent pressure throughout the motion.
This regular maintenance keeps your knives performing at their best between sharpening sessions.
Maintain Edge Regularly
A honing rod should be used weekly to maintain your knife’s edge between sharpening sessions. Regular honing realigns bent microscopic teeth along the blade’s edge. You’ll develop muscle memory through consistent practice.
Hold the rod vertically with your non-dominant hand. Grasp the knife handle firmly with your dominant hand. Draw the blade across the rod from heel to tip using light pressure. Maintain consistent contact between edge and steel. Repeat this motion five to ten times per side.
You’ll notice immediate improvement in cutting performance. Weekly honing extends time between actual sharpening sessions considerably. This routine prevents dullness from developing gradually. Your knives will feel sharp and responsive throughout their lifespan.
Consistent maintenance keeps your kitchen tools performing efficiently. Regular honing becomes second nature quickly.
Proper Angle Technique
When maintaining your knife’s edge weekly with a honing rod, establishing the correct angle is essential for effective blade realignment. Your blade should meet the rod at approximately 15-20 degrees for most kitchen knives. This precise angle guarantees proper edge restoration without damaging the blade’s structure.
- Position the rod vertically – Hold it firmly with your non-dominant hand, keeping it perpendicular to your cutting board surface.
- Maintain consistent pressure – Apply gentle, even pressure as you draw the blade across the rod, letting the knife’s weight do most work.
- Execute smooth strokes – Pull the blade downward in controlled motions, ensuring the entire edge makes contact with the rod from heel to tip.
Master this technique and you’ll join the ranks of confident home cooks who understand proper knife maintenance.
Sharpen With Sandpaper or Emery Board
One effective method for sharpening kitchen knives at home involves using sandpaper or an emery board to restore the blade’s edge.
You’ll need sandpaper with grits between 400 and 1000, or a fine emery board. Maintain the proper angle you’ve already established, typically 15-20 degrees.
Place the knife blade flat on your chosen surface, then draw the blade away from you in one smooth motion, keeping consistent pressure. Work both sides evenly, alternating strokes.
Start with coarser grits if the edge is severely dulled, progressing to finer grits for polishing. Keep your strokes controlled and deliberate.
Test the blade’s sharpness frequently by slicing through paper. This method requires patience but delivers professional results when done correctly.
Your knives will regain their cutting performance quickly.
Restore Edge Using Ceramic Plate
You’ll need to select a ceramic plate with the appropriate grit level for your knife’s current edge condition.
Position the blade at a 15-20 degree angle against the plate’s surface and maintain consistent pressure throughout the sharpening stroke.
Execute smooth, controlled motions away from your body, ensuring the entire edge makes contact with the ceramic surface.
Choosing Right Ceramic Plate
A proper ceramic plate serves as an essential tool for restoring your kitchen knife’s edge through abrasive sharpening. You need to select the right plate to achieve ideal results without damaging your blade.
- Grit selection matters greatly – Choose plates with 1000-3000 grit for kitchen knives. Finer grits create sharper edges while coarser options remove more material quickly.
- Plate dimensions impact usability – Opt for plates measuring at least 6×8 inches to provide adequate sharpening surface area. Larger plates offer better stability and control during the sharpening process.
- Material quality determines longevity – Select plates made from high-density ceramic with consistent grain structure.
Quality plates maintain their flatness and abrasive properties longer, ensuring reliable edge restoration performance.
Proper Sharpening Technique
Hold your knife at a consistent 15-20 degree angle against the ceramic plate’s surface to begin restoring the blade’s edge. Maintain this angle throughout the entire process – it’s essential for proper sharpening.
Starting at the heel of the blade, draw the knife across the plate in one smooth motion, moving from heel to tip. Apply moderate pressure, letting the ceramic do the work.
Repeat this motion ten to twelve times on each side of the blade. Keep your strokes even and controlled, avoiding excessive force that could damage the edge.
Focus on maintaining consistent contact between the blade and plate. You’ll feel slight resistance as the ceramic removes microscopic metal particles, gradually realigning the edge.
Test the sharpness carefully after several passes.
Coffee Mug Handle Sharpening Trick
The ceramic handle of a coffee mug provides an unexpected yet effective sharpening surface for dull kitchen knives. This technique works because ceramic’s hardness exceeds most blade steel, creating the necessary abrasion for edge restoration.
- Positioning: Hold the mug handle firmly against a stable surface, ensuring the ceramic won’t roll during sharpening.
- Angle control: Maintain a consistent 15-20 degree angle between your knife edge and the ceramic surface while drawing the blade across.
- Technique execution: Use controlled, deliberate strokes away from your body, applying moderate pressure while moving from heel to tip of the blade.
This method won’t replace professional sharpening, but it provides temporary edge restoration between proper sessions.
Your kitchen skills deserve sharp tools.
Get Razor Sharp With Leather Belt
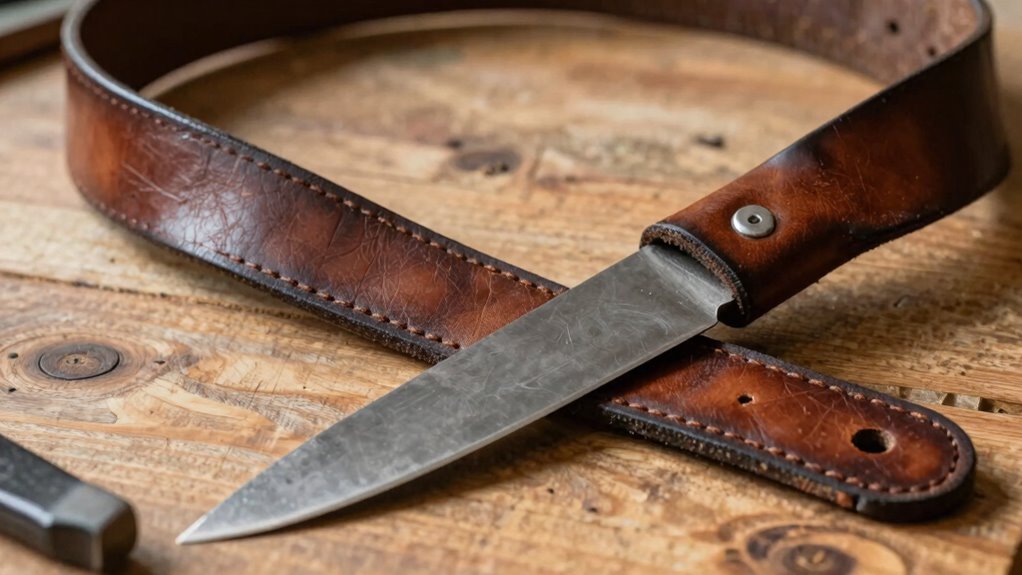
One leather belt can transform your dull kitchen knives into razor-sharp cutting tools with the right technique.
You’ll need a thick, smooth leather belt without studs or decorative elements. Hold the belt taut with one hand and place your knife blade against it at a 15-20 degree angle. Use short, controlled strokes, moving the blade away from the belt edge.
Maintain consistent pressure and angle throughout each stroke. Work systematically from heel to tip, ensuring even contact along the entire blade length. Flip the belt periodically to use both sides.
This method hones the edge created by previous sharpening steps. Master this technique and you’ll achieve professional-level sharpness that makes cutting effortless.
Your knives will perform like they’re freshly factory-sharpened.
File Down the Blade Safely
You’ll need a fine-grit sharpening stone or diamond file to effectively remove dull metal without damaging the blade’s edge.
Maintain a consistent 15-20 degree angle against the blade while applying steady, even pressure throughout each stroke.
Work systematically from the heel to the tip, ensuring you don’t rock the tool which can create an uneven edge.
Choose Proper Filing Tools
Selection of appropriate filing tools determines whether you’ll achieve a razor-sharp edge or damage your blade. You need tools that match your knife’s steel type and current condition.
- Diamond stones cut fastest on damaged blades but require careful pressure control to avoid overheating. Start with 220-grit for reshaping, then progress to 1000-grit for finishing.
- Ceramic rods work best for regular maintenance and fine-tuning edges. Their brittle nature demands gentle, consistent strokes along the entire blade length.
- Sandpaper offers precise grit control when wrapped around flat surfaces. Use 400-grit for heavy reshaping, 800-grit for smoothing, and 1500-grit for final polishing.
Each tool serves specific sharpening stages. Your blade’s condition dictates which combination works best.
Maintain Correct Blade Angle
Maintaining a consistent 15-20 degree angle while filing determines whether your blade achieves peak sharpness or becomes damaged.
You must keep your file parallel to the blade’s bevel throughout the entire stroke. Rest your hand firmly on the knife’s spine for stability.
Angle your file too steep and you’ll create a thick, blunt edge. Too shallow and you’ll never remove enough material to restore sharpness.
Visualize the angle by imagining a thin coin厚度 between your file and the blade. Test the angle periodically by running your finger along the blade’s edge.
Consistency matters more than perfection. Even experienced sharpeners develop their feel through practice. Your blade remembers every incorrect angle you apply.
Apply Even Pressure Technique
Proper angle maintenance becomes meaningless without consistent pressure application during the filing process. You’ll ruin your edge quickly if you’re inconsistent with downward force.
- Start light – Apply gentle, even pressure as you begin each stroke. Too much force creates uneven metal removal and potential damage.
- Maintain steady pressure – Keep consistent downward force throughout the entire filing motion. Your sharpening stone should grip the blade without excessive grinding.
- Focus on rhythm – Develop a smooth, controlled motion that distributes pressure evenly across the blade’s full length. Let the file do the work rather than muscling through strokes.
Your technique determines success more than any expensive tool. Master this pressure control and you’ll achieve professional results consistently.
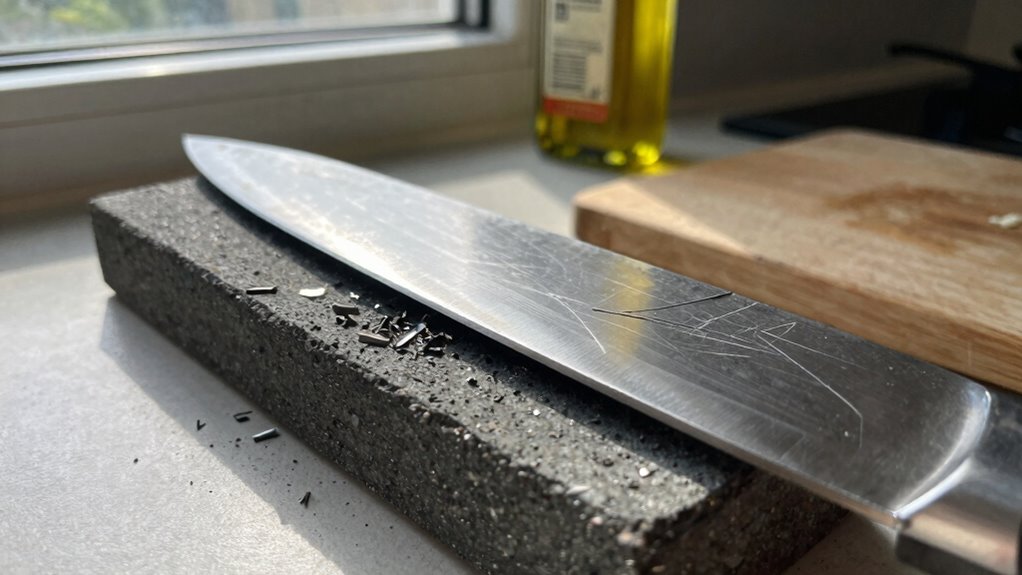
Emergency Sharpen on Concrete
When you’re caught without a proper sharpening tool, concrete can serve as an emergency alternative for restoring your knife’s edge.
Find a clean, rough concrete surface like a sidewalk or driveway. Hold your knife at a 15-20 degree angle against the concrete. Use short, controlled strokes, dragging the blade away from the concrete surface.
Maintain consistent pressure and angle throughout the motion. Repeat this process ten to fifteen times on each side of the blade.
The abrasive concrete surface removes small amounts of steel, creating a fresh cutting edge. Test the sharpness carefully on a tomato or paper.
Clean your knife immediately afterward to remove concrete particles. This method works best on carbon steel blades rather than stainless steel.
Fold Aluminum Foil for Quick Fixes
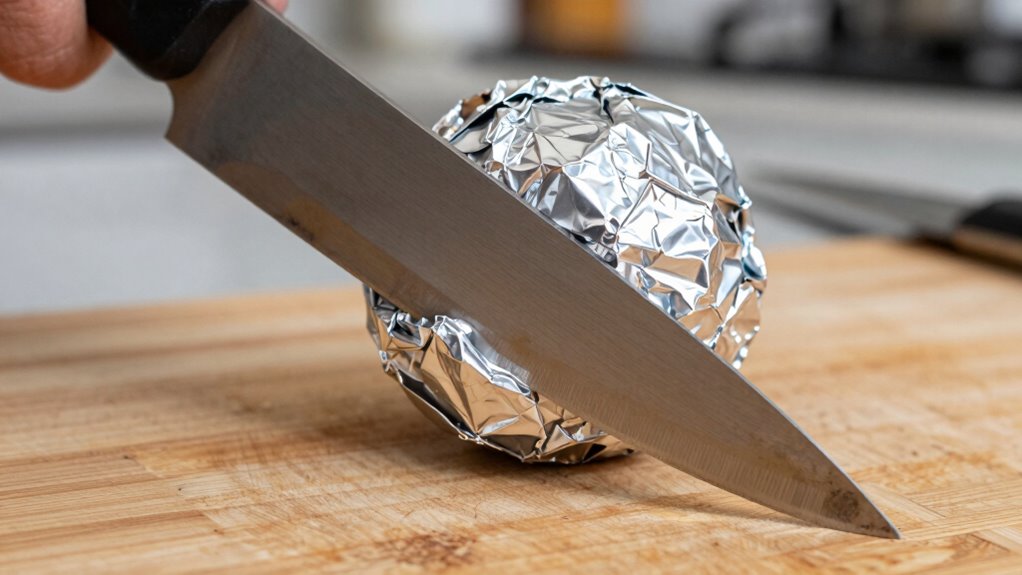
Sharp kitchen knives don’t always require expensive tools or professional services for maintenance. You can use aluminum foil for quick edge restoration when you’re in a pinch.
- Fold foil precisely – Create a tight, multi-layered strip by folding standard kitchen foil back and forth, forming a sturdy abrasive surface that mimics traditional sharpening stones.
- Maintain consistent angle – Hold your knife at 15-20 degrees against the foil surface, matching your blade’s existing bevel for ideal results.
- Execute controlled strokes – Draw the knife across the foil in smooth, deliberate motions, alternating sides evenly to prevent blade distortion.
This technique won’t replace proper sharpening tools but provides temporary edge restoration. The foil’s abrasive particles remove minor burrs and realign dull edges sufficiently for immediate cooking needs.
Keep foil handy for emergency touch-ups.
Maintain Edge on Wooden Cutting Boards
You’ll maintain your knife’s edge longer by cutting against the wood grain, which prevents the blade from catching and tearing the wood fibers.
Regular maintenance requires you to sand and oil your wooden board monthly, keeping the surface smooth and preventing deep grooves that harbor bacteria.
These practices guarantee your cutting board supports rather than compromises your knife’s sharpness.
Proper Wood Grain Alignment
Proper wood grain alignment plays an essential role in maintaining your knife’s edge during cutting tasks. When you cut against the grain direction, you’re working with the wood’s natural structure rather than fighting it.
- Identify grain direction by examining the parallel lines running across your cutting board’s surface. Always cut perpendicular to these lines for ideal edge preservation.
- Position your board so the grain runs horizontally away from your cutting hand. This prevents tear-out and maintains cleaner cuts through食材.
- Rotate your board periodically during extended cutting sessions. This distributes wear evenly across the surface grain patterns, preventing premature dulling in specific areas.
Regular Board Maintenance
While maintaining proper cutting techniques preserves your knife’s edge, regular maintenance of your wooden cutting board is equally critical for sustaining ideal blade performance.
You should sand your board monthly using 220-grit sandpaper, working parallel to the wood grain. Remove any deep cuts or stains that harbor bacteria.
After sanding, wipe clean and apply mineral oil generously. Let it penetrate overnight, then buff excess oil.
Check for loose ends or splinters regularly. Tighten any loose corners with wood glue if needed.
Store your board in a dry area, away from direct sunlight. Replace boards showing excessive wear or deep gouges.
Clean cuts heal better than torn ones, so maintain your board’s surface integrity. Your knives deserve proper foundation support.
Perfect Sharpening Angle by Knife Type
Different knife types require specific sharpening angles to achieve ideal edge performance. You need to match the angle to your knife’s design for best results.
1. Western-style knives (chef’s knives, paring knives): Maintain a 20-degree angle.
These knives have broader blades that benefit from this steeper angle, providing durability and cutting efficiency for general kitchen tasks.
2. Japanese knives (santoku, nakiri, petty knives): Use a 15-degree angle.
These knives feature harder steel and thinner blades, requiring less acute angles for their razor-sharp edges.
3. Pocket knives and utility blades: Apply a 25-degree angle.
These tools need extra durability for various cutting applications beyond kitchen use.
Consistency matters more than perfection when establishing your sharpening routine.
Test Sharpness With Paper or Tomato
How do you know when your knife has been properly sharpened? You test it with paper or tomato.
Hold a piece of standard office paper vertically and slice down through it with your knife’s edge. A properly sharpened blade cuts cleanly through without tearing or requiring excessive pressure. The cut should be smooth and require minimal force.
Alternatively, use a ripe tomato. Place it on a cutting board and slice through the skin with gentle downward pressure. Your knife should penetrate effortlessly, creating clean cuts without crushing the tomato.
These tests confirm your blade’s sharpness meets professional standards. Both methods reveal whether your sharpening angle and technique produced excellent results.
Trust these simple tests—they don’t lie about your knife’s performance.
Common Mistakes That Damage Blades
Although you may be keen to achieve razor-sharp edges, improper sharpening techniques can permanently damage your blades. You’ll wreck your knife’s geometry and compromise its functionality with these errors.
1. Using incorrect angles – You should maintain consistent 15-20 degree angles.
Deviating too much creates weak edges that chip easily.
2. Applying excessive pressure – Let the sharpening tool do the work.
Pressing too hard generates heat that damages steel crystalline structure.
3. Neglecting proper stone preparation – You must flatten water stones regularly.
Uneven surfaces create inconsistent edges and accelerate blade wear.
Avoid these pitfalls to preserve your investment.
Extend Knife Life With Routine Care
Proper maintenance prevents the sharpening mistakes that destroy blade integrity. You should clean your knives immediately after each use, removing food particles and moisture that cause corrosion.
Dry blades thoroughly with a soft cloth before storing.
Regular honing maintains edge alignment between sharpening sessions. Use a honing rod weekly, holding it vertically and stroking the blade at a 15-20 degree angle. This realigns microscopic teeth that bend during cutting.
Avoid cutting on hard surfaces like glass or stone; they accelerate edge wear. Choose wood or plastic cutting boards instead. Never use knives to pry or scrape frozen foods.
Clean blades with mild soap and warm water, avoiding harsh detergents that strip protective coatings. Rinse immediately and towel-dry.
Inspect edges regularly for nicks or dullness requiring attention.
How to Store Knives Properly
While maintaining sharp edges through proper sharpening techniques is essential, storing your knives correctly prevents damage that can occur even with the best cutting tools. Improper storage causes blade dulling, edge chipping, and potential safety hazards during use.
- Use a knife block or magnetic strip – These storage methods keep blades separated and protected. Avoid crowded drawers where knives bang against each other and hard surfaces.
- Store knives blade-down or edge-away – When using blocks, insert knives blade-down. For drawer storage, use blade guards or sheaths to protect edges from contact damage.
- Keep knives in dry, climate-controlled environments – Moisture causes rust and corrosion. Store knives away from heat sources and humidity to maintain blade integrity and prolong sharpness between sharpening sessions.
When to Call a Pro Sharpener
Even after mastering basic sharpening techniques, you’ll encounter situations where professional intervention becomes necessary to restore your knives’ performance.
When blades develop significant nicks, deep gouges, or severe pitting, home methods won’t suffice. Professional sharpeners possess specialized equipment like bench stones, honing guides, and precision angle setters that achieve factory-original edges.
You’ll recognize when it’s time to call a pro: inconsistent cutting performance despite proper technique, visible blade damage, or when knives require restoration rather than routine maintenance.
Professional sharpening addresses structural issues, restores proper bevel angles, and removes extensive wear patterns.
Don’t mistake stubborn dullness for irreparable damage—sometimes consistent technique refinement solves performance issues. However, when home efforts yield diminishing returns, seeking professional expertise guarantees your knives regain peak functionality and longevity.
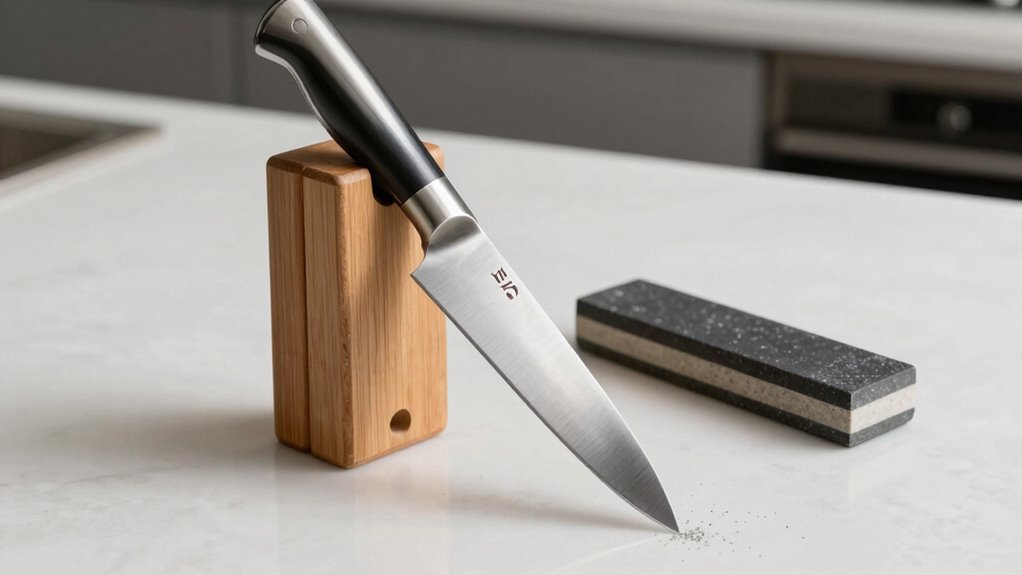
Build a Home Sharpening Kit
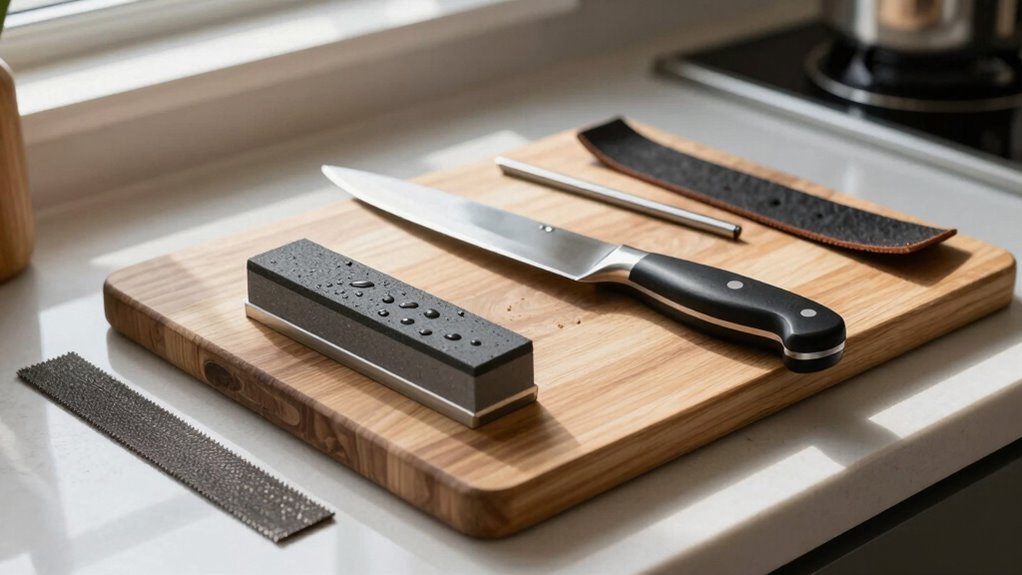
A basic home sharpening kit requires three essential tools: a coarse whetstone for repairing damaged edges, a fine whetstone for refining the blade, and a honing rod for maintaining alignment between sessions.
You’ll want to select stones with appropriate grit levels – around 1000 for coarse and 4000-8000 for fine. Keep your kit simple but effective.
- Coarse whetstone (1000 grit) – Repairs nicks and restores damaged edges quickly
- Fine whetstone (4000-8000 grit) – Creates razor-sharp finish and polished edge
- Ceramic honing rod – Maintains blade alignment between full sharpening sessions
Your investment in these three tools will transform your kitchen workflow.
You’ll join the community of home cooks who refuse to accept dull knives.
Conclusion
You can maintain sharp knives with household items: use ceramic mugs for quick touch-ups, leather belts for edge restoration, and sandpaper for deeper sharpening. Regular honing prevents dullness, proper storage extends blade life, and routine care keeps cutting edges precise. Don’t wait until knives are dangerously dull—maintain them weekly, store them properly, and sharpen them regularly. Your kitchen knives will stay sharp, safe, and ready for any cutting task.
")