You don’t need a rice cooker to make perfect rice. Grab a heavy-bottomed pot, measure your rice properly, and rinse it until the water runs clear. Use the right water ratio, bring it to a rolling boil, then simmer covered for 15-18 minutes. But there’s more to getting restaurant-quality results at home…
Skip the Rice Cooker: It’s Easier Than You Think
While many people rely on rice cookers for foolproof results, you can achieve perfect rice on the stovetop with just a few simple techniques.
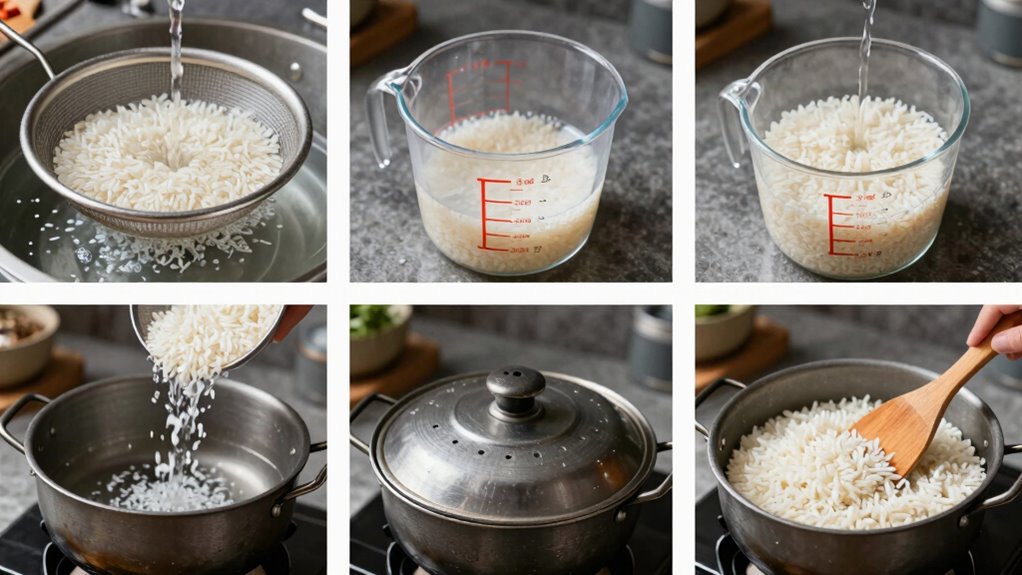
You’ll need a heavy-bottomed pot with a tight-fitting lid and the right water-to-rice ratio. Rinse your rice thoroughly until the water runs clear, then let it drain completely.
Heat your pot over medium heat with a bit of oil or butter, add the rice, and toast it briefly. Pour in the measured water, bring it to a boil, then immediately reduce heat to low.
Cover the pot tightly and don’t lift the lid for twenty minutes. Your rice will steam perfectly without any guesswork.
Once time’s up, let it sit for five minutes before fluffing. You’ve got restaurant-quality rice every time.
Know What Kind of Rice You’re Cooking
You need to identify whether you’re working with long-grain, medium-grain, or short-grain rice before you start cooking.
Each type requires specific water ratios and cooking times to achieve perfect results. Knowing your rice variety guarantees you apply the correct technique for fluffy, well-cooked grains.
Types Of Rice To Identify
Knowing what kind of rice you’re working with makes all the difference in achieving perfect results.
You’ll encounter long-grain varieties like basmati and jasmine, which stay separate and fluffy when cooked properly.
Medium-grain rice, such as arborio, becomes creamy and slightly sticky, perfect for risotto.
Short-grain rice turns very sticky and is ideal for sushi or rice pudding.
Brown rice retains its bran layer, requiring longer cooking times and more water than white rice.
Wild rice isn’t actually rice but a grass seed, offering a nutty flavor and chewy texture.
Sticky rice, also called glutinous rice, becomes extremely sticky when cooked and is essential for many Asian desserts.
Each type demands specific handling to reveal its full potential.
Cooking Method By Rice Variety
Since each rice variety has distinct characteristics, matching your cooking method to the specific type guarantees ideal results.
You must identify your rice type first – long grain, short grain, or medium grain. Long grain rice like basmati or jasmine requires less water and longer cooking times. Short grain rice needs more water and shorter cooking periods. Medium grain falls between these extremes.
White rice cooks faster than brown rice due to its processing. Brown rice requires extra water and extended cooking times. Arborio rice needs constant stirring for creamy results. Wild rice demands longer cooking times and different water ratios.
You can’t use identical methods for all varieties. Each type responds differently to heat, water, and timing. Master these distinctions and you’ll achieve perfect results every time.
Measure Rice and Water With Precision
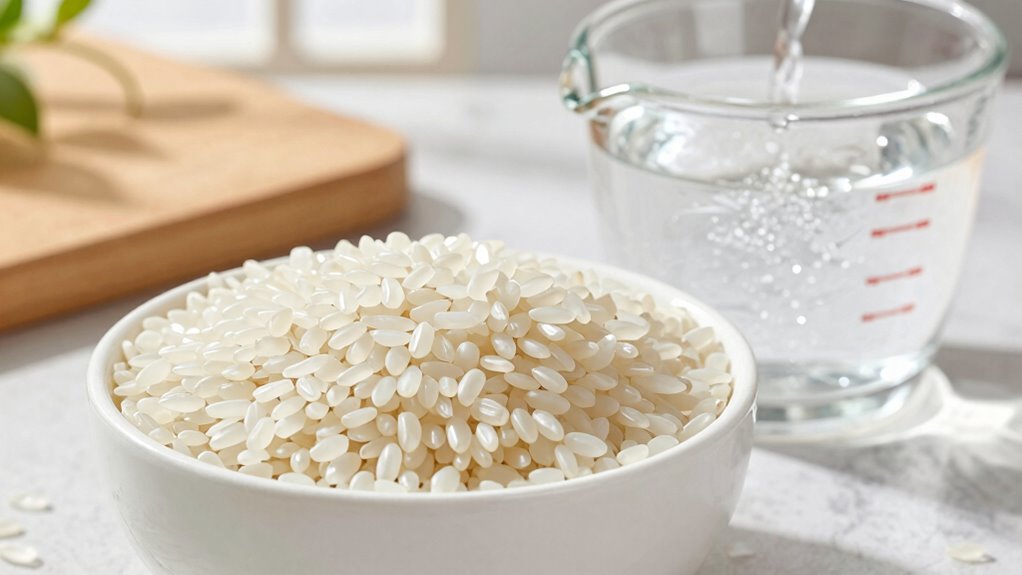
Accurate measurement forms the foundation of perfect rice cooking. You must use a proper measuring cup designed for rice, not a standard liquid measuring cup.
For long-grain white rice, use a 2:1 water-to-rice ratio. Brown rice requires more liquid, typically 2.5:1. Short-grain varieties need less water, around 1.5:1.
Always measure rice before washing it. One cup of uncooked rice yields approximately three cups of cooked rice. Don’t eyeball these proportions; precise measurements guarantee consistent results every time.
Use cold, filtered water for better taste. Remember that different brands may vary slightly in absorption rates. Keep notes about your preferred ratios for future reference.
This attention to detail transforms good rice into perfect rice that’ll make you feel confident in your kitchen skills.
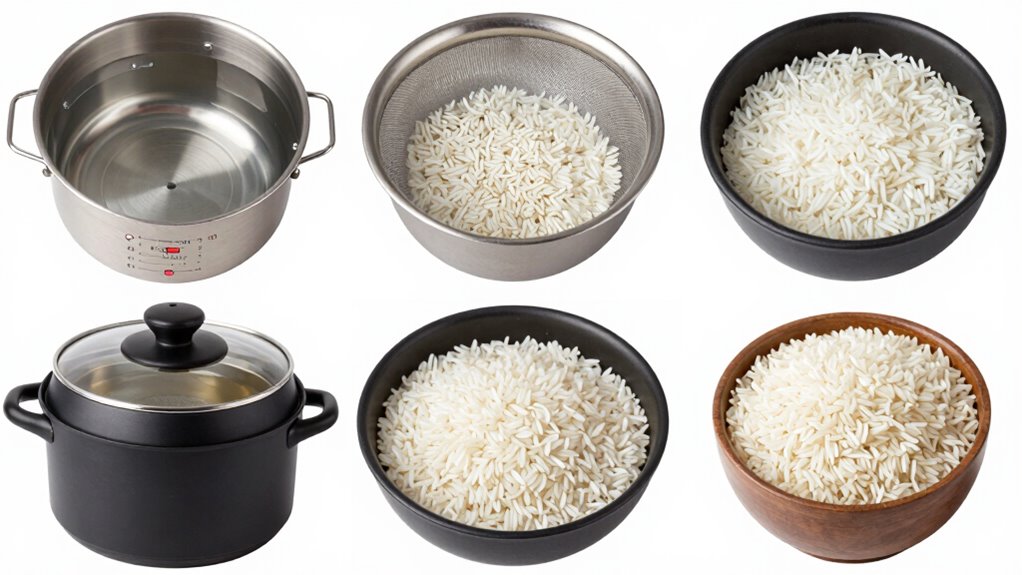
Choose the Best Pot for Your Rice
You should select a heavy-bottomed saucepan that distributes heat evenly across its surface to prevent hot spots that can scorch your rice.
The material matters too—stainless steel and aluminum conduct heat well, while copper offers superior heat responsiveness for precise temperature control.
These pot characteristics work together to create the consistent, gentle heat needed for perfectly cooked rice grains.
Heavy-Bottomed Saucepan Benefits
A heavy-bottomed saucepan makes all the difference when cooking rice because it distributes heat evenly across the surface.
You’ll prevent hot spots that cause burning and guarantee consistent cooking throughout your pot. The thick base retains heat effectively, maintaining steady temperature during absorption. This even heating prevents undercooked centers while avoiding overcooked edges.
Your rice grains stay intact instead of breaking apart from uneven temperatures. You’ll achieve that perfect fluffy texture every time.
Look for pots with bases at least three millimeters thick for superior performance.
Don’t skip this vital equipment choice – it transforms your rice cooking results completely. Your family will notice the difference immediately.
Pot Material And Heat Distribution
While a heavy-bottomed saucepan provides excellent heat distribution, the material you choose equally impacts your rice cooking success. You want consistent heat that won’t create hot spots or uneven cooking.
Consider these three essential pot materials:
- Stainless steel conducts heat evenly and resists warping, making it ideal for consistent results.
- Carbon steel heats quickly and retains temperature perfectly, giving you precise control over cooking.
- Enamel-coated cast iron distributes heat slowly but maintains steady temperature throughout cooking.
Avoid thin aluminum or non-stick coated pots that create uneven heating patterns. Your rice deserves better than hot spots that leave some grains undercooked while others overcook.
Choose a pot material that makes you feel confident and capable in your kitchen.
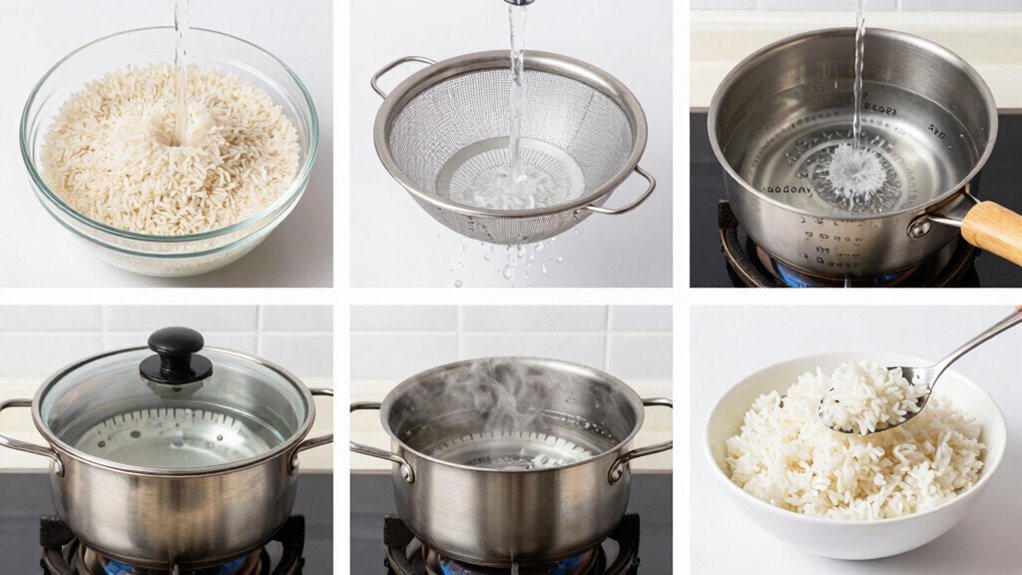
Rinse Rice to Prevent Sticking
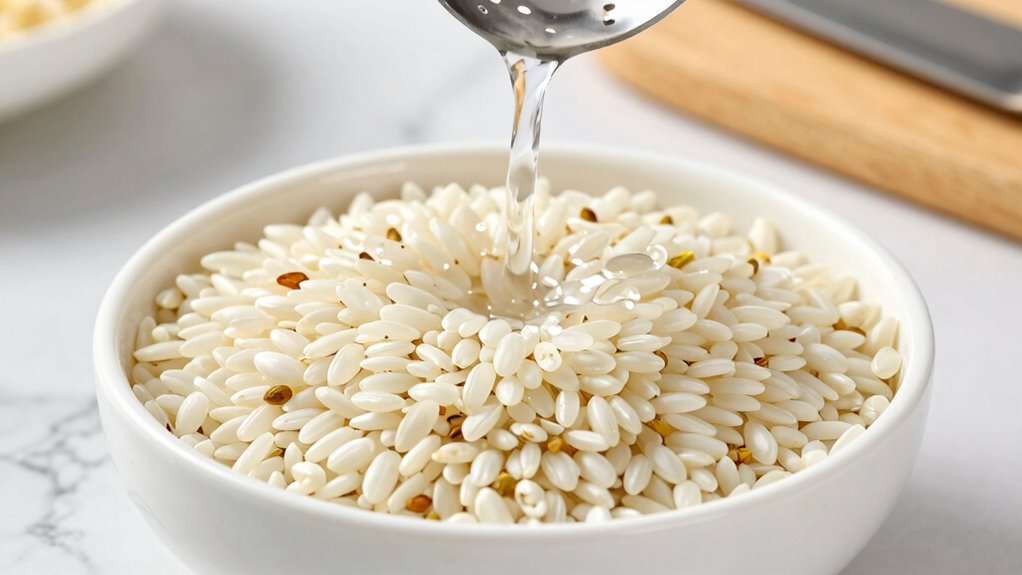
Rinsing rice before cooking removes excess starch that causes grains to stick together. You should place your rice in a fine-mesh strainer and run cold water over it until the water runs clear. This process typically takes two to three minutes of continuous rinsing.
The starch removal prevents clumping and guarantees each grain maintains its individual integrity during cooking. Don’t skip this vital step, as it directly impacts your rice’s final texture. Some rice varieties like basmati or jasmine require less rinsing due to their natural processing, but most standard white and brown rice benefit notably from thorough rinsing.
Keep checking the water drainage; when it’s no longer cloudy, you’re finished. Proper rinsing creates the foundation for perfectly separated, fluffy rice every time.
Combine Rice and Water Carefully
After rinsing your rice thoroughly, you’re ready to combine it with water for cooking.
Getting the rice-to-water ratio right makes the difference between perfect, fluffy rice and a mushy mess.
- Use the correct ratio: Measure 1 cup rice to 2 cups water for most varieties
- Choose your pot wisely: Use a heavy-bottomed saucepan with a tight-fitting lid
- Don’t rush the process: Let the rice sit in the water for 5 minutes before cooking
Pour measured water into your pot first, then add the rinsed rice.
This prevents over-measuring and guarantees even distribution. Stir gently once to remove any remaining starch.
Your rice mixture should look clean and fresh, ready for the next cooking phase.
Bring Water to a Boil First
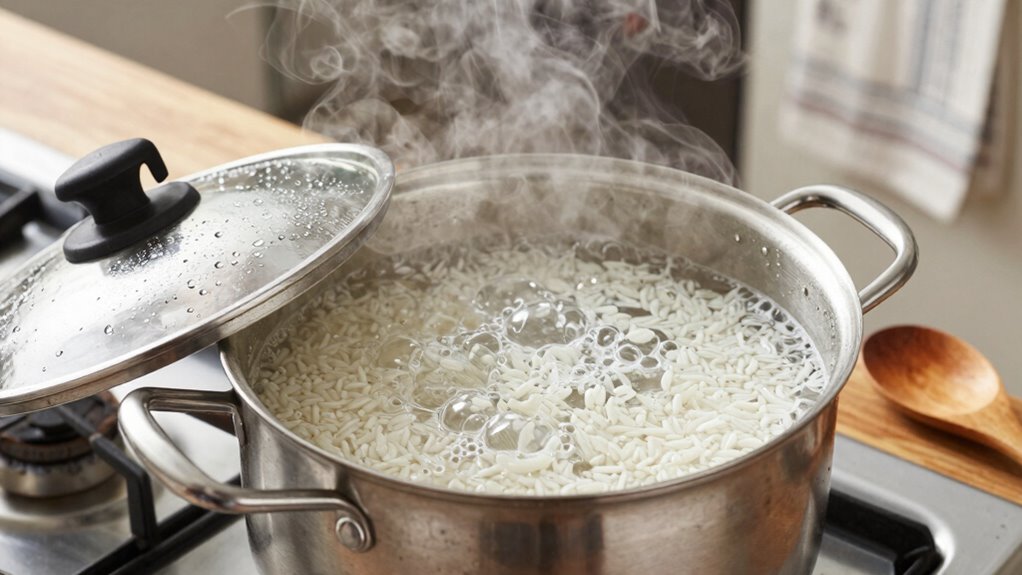
The key to perfect rice starts with bringing your water to a rolling boil before adding the rice.
You’ll know the water’s ready when large bubbles break the surface vigorously. This guarantees even cooking from the moment your rice hits the pot.
Cold or lukewarm water creates uneven temperature distribution, leading to mushy or undercooked grains.
Place your pot on high heat and wait patiently. Don’t rush this step. Your rice deserves proper preparation.
The boiling water jumpstarts the cooking process immediately, creating those ideal conditions every home cook seeks.
You’re building confidence with each successful batch. Master this fundamental step and you’ll join the ranks of those who cook rice perfectly every time.
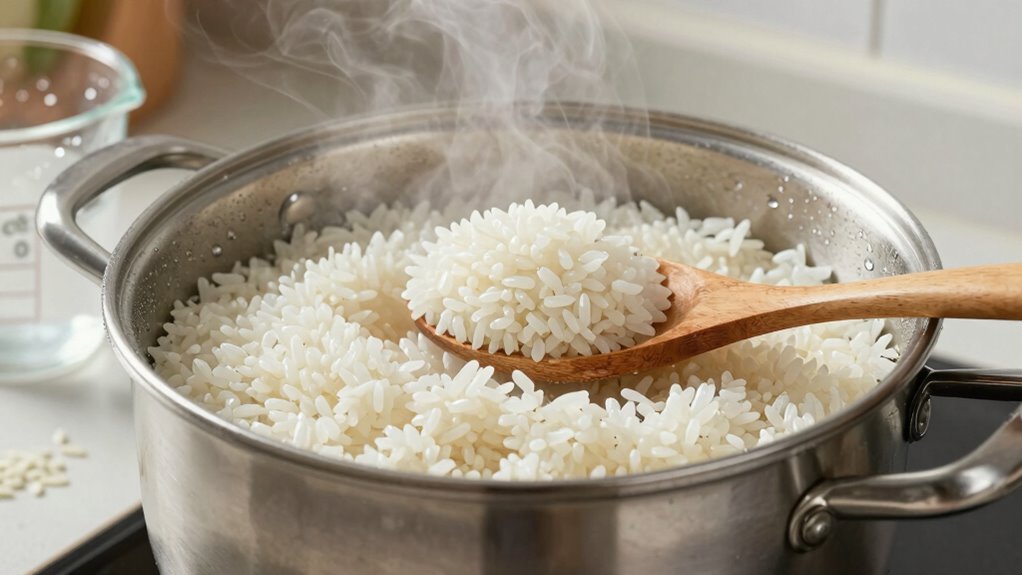
Cover Pot Once It Simmers
You should cover the pot immediately once the water reaches a simmer to trap the steam essential for cooking the rice properly.
Reduce the heat to low to maintain a gentle simmer without lifting the lid.
Let the rice steam undisturbed for the recommended cooking time.
Cover Pot Immediately
Once the water reaches a rolling boil and you’ve added the rice, immediately cover the pot with a tight-fitting lid to trap the steam. This vital step guarantees even cooking and prevents moisture loss.
- Steam retention creates the ideal cooking environment for fluffy, perfectly textured rice.
- Heat distribution becomes more consistent when the pot is sealed, eliminating hot spots.
- Flavor development improves as aromatic compounds stay trapped rather than escaping.
You’ll notice the difference this simple step makes. Your rice will cook uniformly without becoming mushy or undercooked.
The trapped steam circulates around each grain, guaranteeing thorough cooking. Don’t peek or lift the lid during this process. Trust the method and let the steam work its magic.
This technique works every time, giving you restaurant-quality rice at home.
Reduce Heat Level
After trapping the steam with a tight-fitting lid, you’ll need to reduce heat immediately to maintain steady simmering rather than aggressive boiling.
Turn your burner down to low or medium-low heat level. You want to see gentle bubbling, not furious rolling boil. Too much heat causes rice to cook unevenly and potentially burn on bottom while remaining undercooked on top.
Listen for steady, quiet simmering sound rather than loud bubbling. Adjust heat as needed throughout cooking process. Proper heat level keeps steam circulating gently around grains. This guarantees even moisture absorption and prevents overcooking.
Your rice cooker’s automatic settings handle this perfectly, but stovetop method requires your attention. Master this step, and you’ll achieve restaurant-quality results consistently.
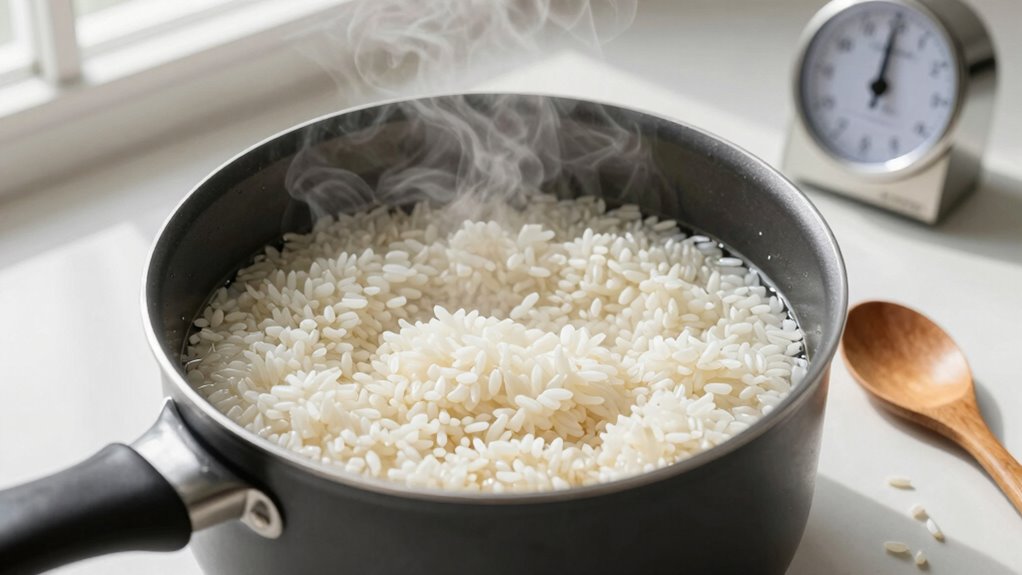
Let Rice Steam
The moment your rice begins to simmer, cover the pot immediately to trap the steam vital for perfect cooking. Don’t lift the lid during this critical phase – you’re building the foundation for fluffy, evenly cooked grains that’ll make you feel like part of the cooking community who nails this every time.
- Steam circulation guarantees each grain absorbs moisture uniformly
- Maintaining consistent heat prevents undercooked centers
- Patience during steaming creates that satisfying texture you’ve been craving
Keep the heat low and steady for 15-18 minutes. The trapped steam transforms hard grains into tender perfection. Trust this process – it’s what separates good rice from great rice.
You’re not just cooking; you’re mastering a skill that connects you to countless home cooks who’ve succeeded before you.
Turn Down the Heat So It Simmers Gently
Most home cooks make the mistake of keeping their rice at a rolling boil, but you’ll achieve better results by reducing the heat to maintain a gentle simmer.
Once you see small bubbles breaking the surface, immediately turn down the heat to low. You want just a few bubbles occasionally, not constant vigorous boiling.
This gentle approach prevents the rice from becoming mushy or sticking to the bottom. Keep the lid on tight to trap steam and sustain even cooking temperature.
Your rice should simmer quietly, not bubble aggressively. Trust this method because it’s what restaurant chefs use for perfect results.
The gentle heat guarantees each grain cooks evenly without overcooking the exterior while leaving the center undercooked. You’re now cooking like a pro.
Allow Rice to Steam Until Tender
You need to keep the pot covered tightly to trap steam and let the rice finish cooking gently.
Don’t lift the lid or stir during this resting period.
Test a few grains for tenderness before serving.
Cover Pot To Trap Steam
After bringing your rice to a boil, cover the pot tightly with a lid to trap the steam inside. This vital step creates the ideal environment for perfectly tender grains.
You’ll want to pay attention to these key points:
- Steam circulation: The trapped moisture circulates around the rice, ensuring even cooking throughout.
- Heat distribution: Properly trapped heat reaches every grain uniformly.
- Texture development: Consistent steaming prevents undercooked centers while avoiding mushy exteriors.
Keep the lid on tight and resist peeking during this critical phase.
Your patience here determines whether you’ll achieve restaurant-quality rice that makes everyone feel right at home at your dinner table. Trust the process completely.
Let Rice Rest After Cooking
Once the rice has absorbed all the water and the cooking cycle is complete, remove the pot from heat and let it rest undisturbed for 10-15 minutes.
This resting period allows trapped steam to continue cooking the rice gently, ensuring even moisture distribution throughout each grain.
Don’t lift the lid during this time, as you’ll release valuable steam that helps achieve that perfect, fluffy texture.
The rice will finish steaming itself, transforming from merely cooked grains into tender, cohesive rice that belongs on your table.
Trust this process – it’s what separates good rice from great rice.
Your patience during these quiet minutes will reward you with properly cooked rice that holds together beautifully when served.
Check Doneness Before Serving
How do you know when your rice is perfectly cooked? You’ll want to check for these key signs that indicate doneness:
- Visual cues: Rice should appear plump and tender, not hard or chalky.
- Texture test: Gently press a grain between your fingers – it should give slightly without being mushy.
- Steam disappearance: Any remaining steam should have dissipated, indicating proper moisture absorption.
Don’t rush this step. Your rice deserves proper attention to guarantee it’s neither undercooked nor overcooked.
Trust your instincts and these indicators. When grains are tender and fluffy, you’ve achieved perfection.
This moment determines whether your rice becomes the foundation of a memorable meal or just another side dish.
How Long Does Rice Take to Cook?
Why does cooking time matter so much for perfect rice?
You need to understand that timing affects texture and doneness directly. Different rice types require specific cooking durations to achieve that perfect fluffy consistency you crave.
White rice typically takes eighteen to twenty minutes, while brown rice needs thirty to thirty-five minutes. Your stovetop method matters too – simmering versus boiling creates different results.
You should time your cooking precisely because undercooked rice stays hard and crunchy, while overcooked rice becomes mushy and sticky. Knowing exact cooking times helps you master rice preparation confidently.
You’ll impress family and friends when you serve perfectly timed, restaurant-quality rice every single time.
Is Your Rice Ready to Eat?
You need to check your rice texture by gently pressing a few grains between your fingers to guarantee they’re tender but not mushy.
Test grain doneness by tasting a small sample to confirm the rice has lost its raw, starchy flavor.
Verify moisture levels by lifting the lid and checking that all water has been absorbed and the rice isn’t sitting in liquid.
Check Rice Texture
When should you check if your rice has reached the perfect texture? Don’t guess – use these reliable methods to test doneness properly.
You’ll want to evaluate your rice using these key techniques:
- Visual inspection: Look for grains that appear plump and have absorbed most liquid, with just a slight translucency remaining.
- Tactile test: Gently press rice grains between your fingers – they should feel tender but still offer slight resistance, not mushy or hard.
- Fluff test: Lightly stir rice with a fork; properly cooked grains separate easily rather than sticking together in clumps.
These methods work regardless of rice type you’re preparing. Trust your senses instead of relying on timers alone.
Your rice should feel satisfyingly tender while maintaining individual grain integrity. Mastering this texture check guarantees you’ll never serve undercooked or overcooked rice again.
Test Grain Doneness
How do you know the exact moment your rice has reached ideal doneness? You’ll see the grains have absorbed most of the water and appear plump rather than hard.
Take a fork and gently press a few grains – they should feel tender but not mushy. The rice shouldn’t stick excessively to your fork. Bite into a grain; it should offer slight resistance while remaining soft throughout.
Look for steam dissipating from the pot, indicating moisture has been absorbed. Your rice is ready when grains maintain their shape while feeling completely cooked.
Don’t wait for all water to evaporate completely – the rice will continue cooking from residual heat. Trust these visual and tactile cues rather than relying solely on timing.
Verify Moisture Levels
Proper moisture levels determine whether your rice becomes perfectly tender or disappointingly dry. You need to check the rice’s hydration status before serving.
- Fluff and inspect – Gently fluff rice with a fork and look for any remaining water pooled at the bottom.
- Squeeze test – Take a grain between your fingers; properly cooked rice should give slightly without crumbling.
- Visual cues – Observe if grains appear plump and have absorbed all visible liquid.
If rice looks chalky or feels hard, add tablespoon of hot water, cover pot, and let steam for two minutes.
Don’t guess when you can verify. Your perfect rice is within reach when moisture content feels just right.
Trust your senses – you’ve got this! Mastering rice cooking connects you to countless home cooks who’ve achieved that satisfying, fluffy result through proper moisture verification.
Fix Hard or Undercooked Rice Fast
If your rice turns out hard or undercooked, don’t despair because you can quickly fix it with these simple techniques.
Add hot water to the pot, about two tablespoons per cup of rice. Cover the pot and cook over low heat for five minutes. Check the rice frequently and add more water if needed.
You can also transfer the rice to a microwave-safe bowl, add water, cover with a damp paper towel, and microwave for one minute intervals until tender.
Another option involves steaming the rice in a covered pot over simmering water for ten minutes.
These methods work because they reintroduce moisture and heat, allowing the rice grains to absorb water properly.
Don’t worry about making mistakes—every cook faces this issue and mastering these fixes makes you part of the cooking community.
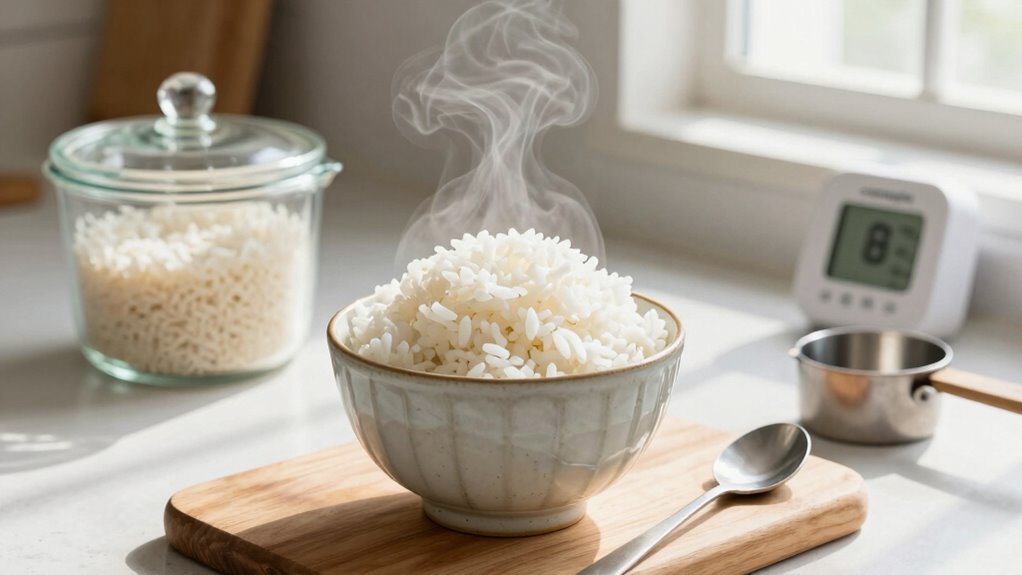
Fluff Rice Properly for Light Texture
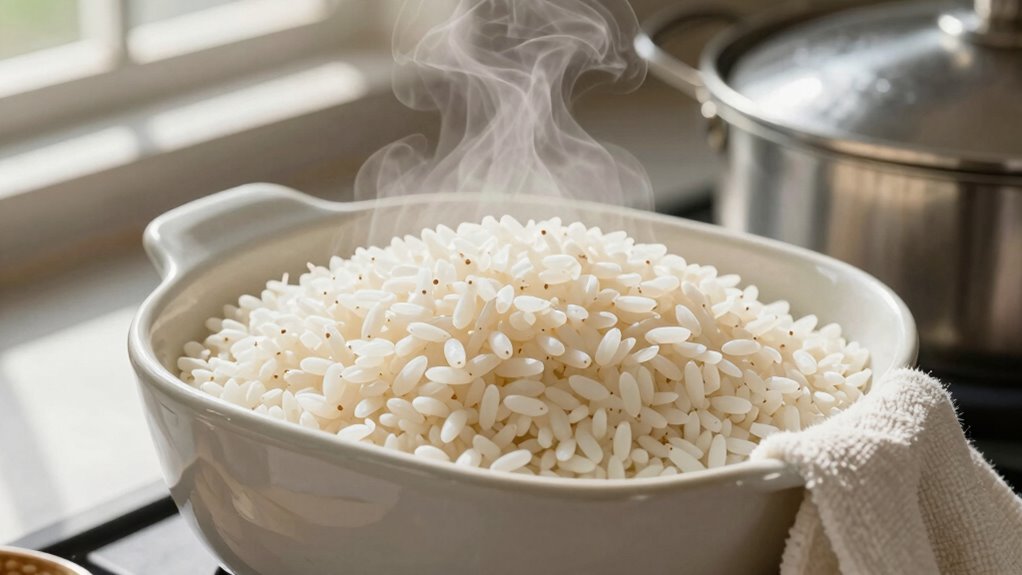
Although many cooks overlook this essential step, fluffing rice properly makes the difference between a light, airy texture and a dense, gluey mess.
You need to wait until steam dissipates completely before fluffing, usually about five minutes after cooking.
Here’s what you must know:
- Use a fork, never a spoon, to gently separate grains
- Work from the bottom up, lifting and turning rice gently
- Fluff immediately after resting time for best results
Master this technique and you’ll achieve that perfect, restaurant-quality rice every time.
Your family will notice the difference instantly.
Avoid These 5 Easy Cooking Mistakes
Even experienced cooks make these common rice preparation errors that can ruin your meal.
First, don’t skip rinsing rice thoroughly before cooking—it removes excess starch that causes stickiness.
Second, avoid lifting the lid while rice cooks; steam escape prevents proper steaming.
Third, resist the urge to stir rice during cooking, which breaks grains and creates mush.
Fourth, don’t ignore water ratio differences between rice types; too much water creates soggy results.
Finally, avoid cutting corners on resting time after cooking; rice needs five minutes undisturbed to absorb remaining moisture.
These mistakes separate amateur rice from restaurant-quality results. Master these fundamentals and you’ll join the ranks of confident home cooks who consistently achieve perfect rice texture.
Special Types of Rice Need Special Timing
Now that you understand the fundamental mistakes to avoid, you’ll need to adjust your approach based on the specific type of rice you’re cooking. Different varieties require unique timing and techniques to achieve perfect results.
You’ll discover that mastering these variations makes you part of an elite group who consistently cooks flawless rice.
Here’s what you need to know:
- Basmati and jasmine rice need less water and longer simmering times to develop their distinctive aromas.
- Short-grain sushi rice requires more water and shorter cooking periods to maintain sticky texture.
- Wild rice demands double the cooking time and extra liquid compared to regular white rice.
Each type has its own personality, and understanding these differences helps you belong among skilled home cooks who never serve mushy or undercooked rice again.
Adapt Method for Brown Rice Too
While you’ve mastered the timing for white rice varieties, brown rice requires a different approach that accounts for its outer bran layer.
You’ll need to increase the water ratio to 2.5 cups per cup of brown rice. Bring the water to a boil, add the rice, then reduce heat to low and cover tightly.
Cook for 40-45 minutes instead of 18-20 minutes. Don’t lift the lid during cooking; the extra time allows the bran to soften properly.
You’ll notice the water absorbs completely, and the rice develops a nutty flavor and chewy texture. Trust this longer process—it’s essential for perfectly cooked brown rice that deserves a place at your table.
Safely Store Leftovers Overnight
Once you’ve cooked your rice to perfection, proper storage becomes just as important as the cooking process itself. You want to maintain that perfect texture and flavor for tomorrow’s meals.
Follow these essential steps for overnight storage:
- Cool rice completely before storing it in airtight containers
- Refrigerate within two hours of cooking to prevent bacterial growth
- Use shallow containers to guarantee even cooling throughout
Store your rice properly and you’ll enjoy the same great taste tomorrow. Your future self will thank you for taking these simple steps today.
Reheat Like a Pro Without Drying Out
How do you reheat rice without turning it into a dry, hard mess? You master the steam method. Add two tablespoons of water per cup of rice to your microwave-safe container.
Cover tightly with a microwave-safe lid or damp paper towel. Heat on high for one minute, then check temperature. Continue heating in thirty-second intervals until steaming hot throughout. Don’t skip the water addition – it’s essential for maintaining moisture.
For stovetop reheating, use a covered saucepan with added water or broth. Cook over low heat, stirring occasionally. The key is low heat and trapped steam.
This technique works every time, giving you restaurant-quality reheated rice that tastes fresh. Your family will never know it’s leftovers.
Conclusion
You’ve mastered the art of perfect rice without relying on fancy gadgets. With proper technique and attention to detail, you’re now equipped to handle any rice variety that comes your way. Your kitchen skills have truly “elevated” from this simple yet transformative method.
")